Setting Up Firebase Messaging (Android Push Notifications)

To enable Push Notifications in your Android App, you must first create the necessary 'google-services.json' file and 'service-account.json' file in Google Firebase.
This tutorial explains how to generate these files from start to finish and how to incorporate them into your Android App, as part the build request process in App Wizard.
Note: In mid 2024, Google deprecated Firebase Cloud Messaging (FCM) API's as used by App Wizard to send Push Notifications on Android devices. The old server key has been removed due to changes in the communication between our server and the FCM server.
If you previously had PN's setup with FCM protocols (ie. prior to July 2024) you will need to follow the steps below to update your Android PN service.
1. Required Firebase Files |
In order to enable Push Notifications in any Android App, you need to create two particular files:
a. the google-services.json file; and
b. the service-account.json file.
Both these file can be created in the Google Firebase Console. If you don't have a Google Developer Account, you'll need to create one first before going to the Firebase Console.
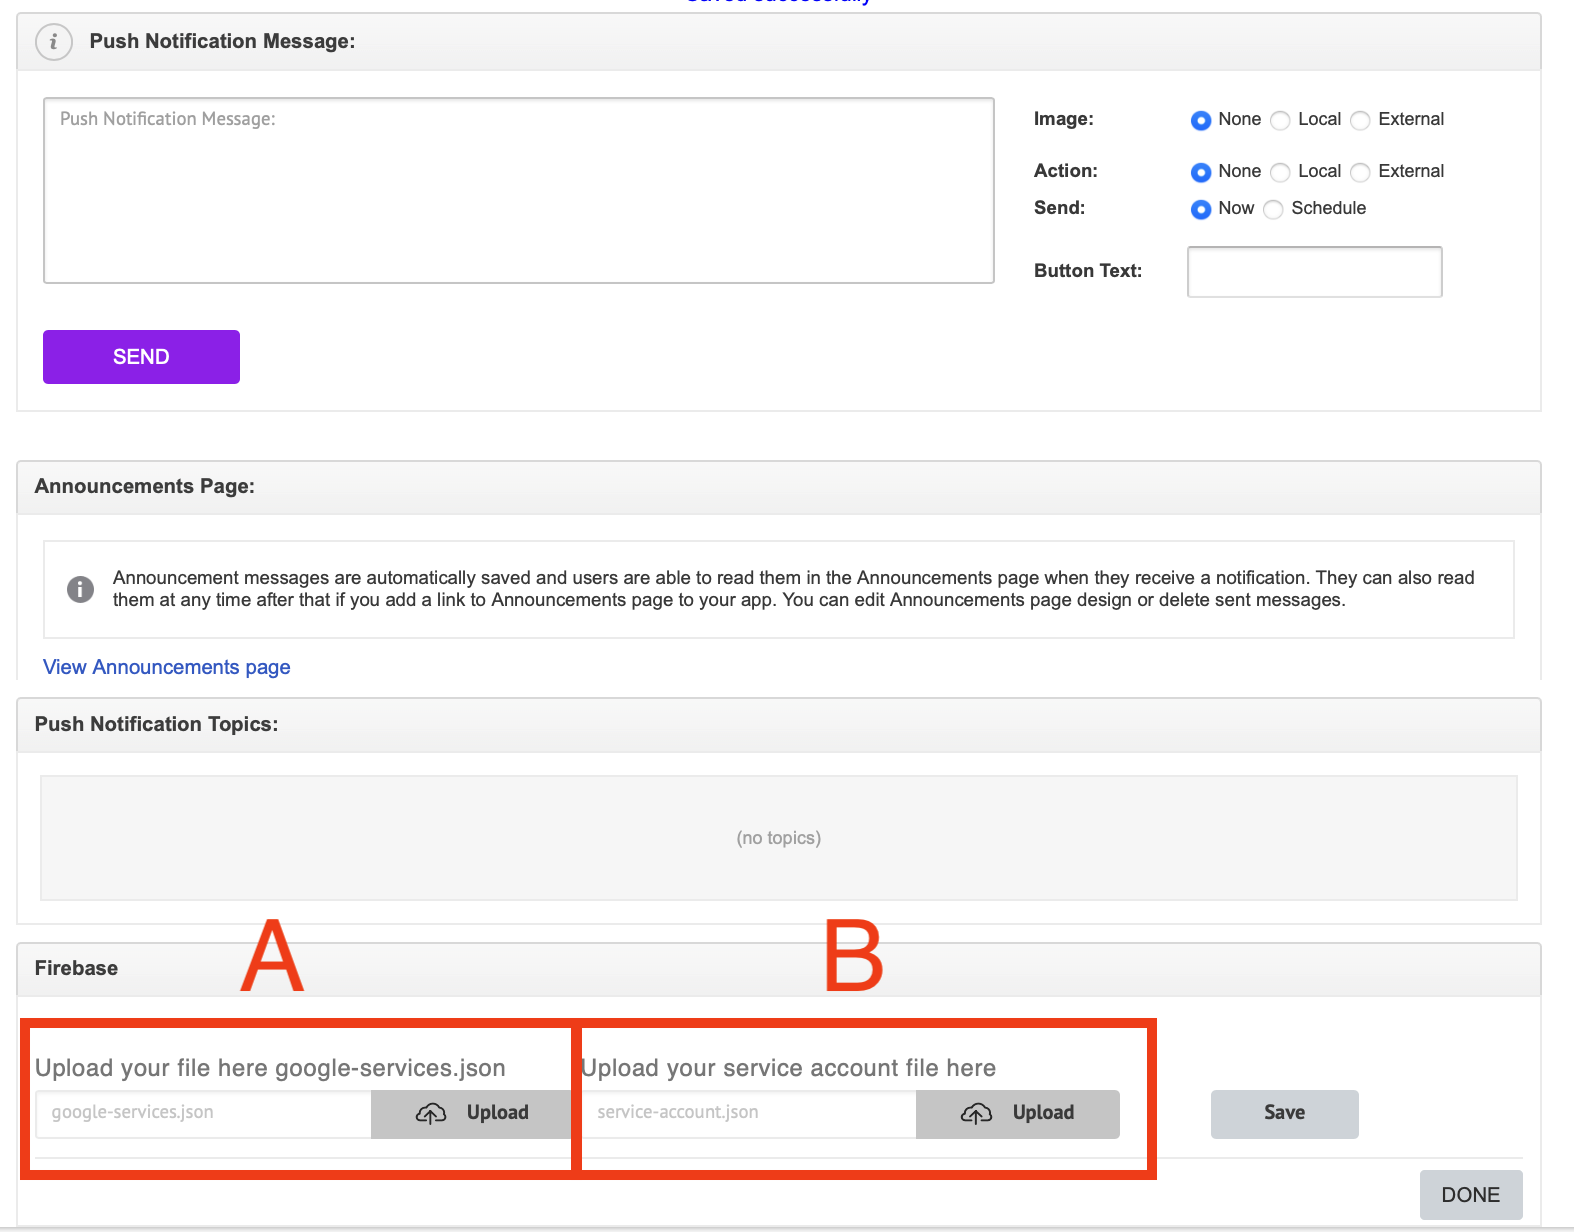
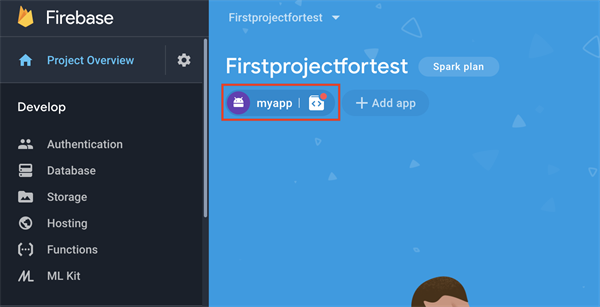
This screenshot below shows the Push Notifications section for an example Android App (accessed from the App's Dashboard). Once the files are created, they are added at the bottom of the page (as highlighted).
2. Create a New Firebase Project |
First of all you will have to create a new project in the Firebase Console.

Open the Firebase Console and select 'Add Project' (as shown above).
3. Name Your Project |
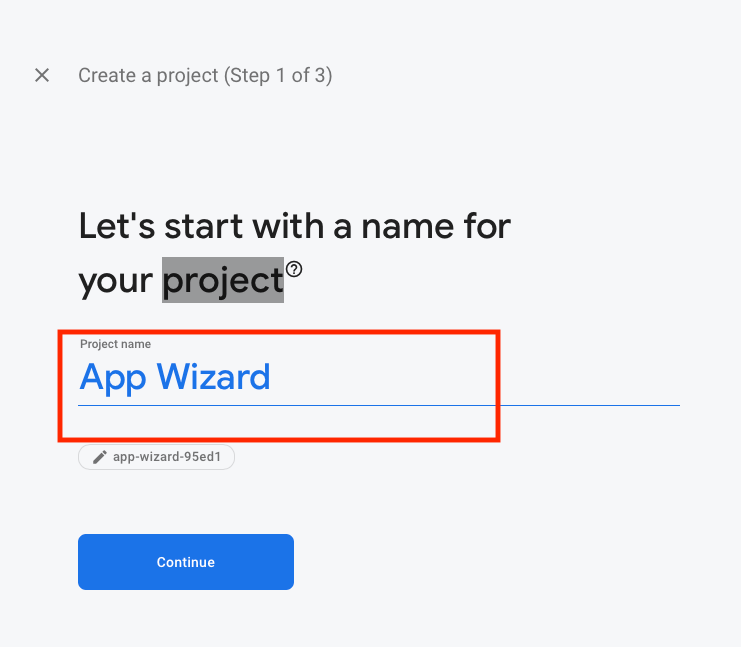
In the 'Project Name' field, enter your project name and select continue. We recommend you use the same name as the Android App which you intend to enable Push Notifications in.
4. Enable Google Analytics |
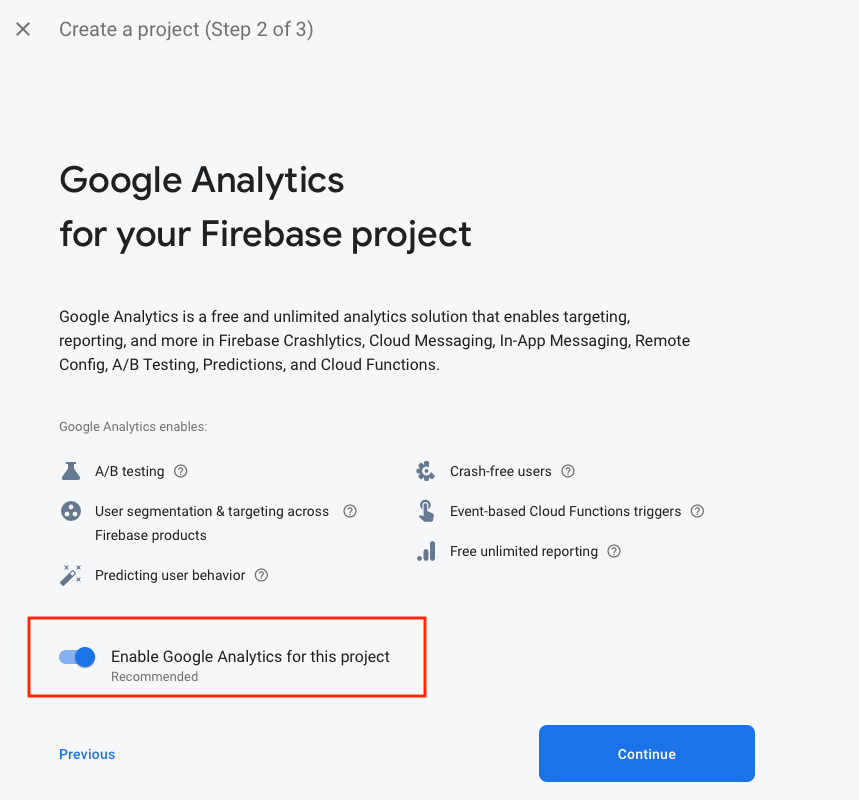
Toggle the 'Enable Google Analytics for this project' switch on, and then click 'Continue'.
5. Configure Google Analytics |
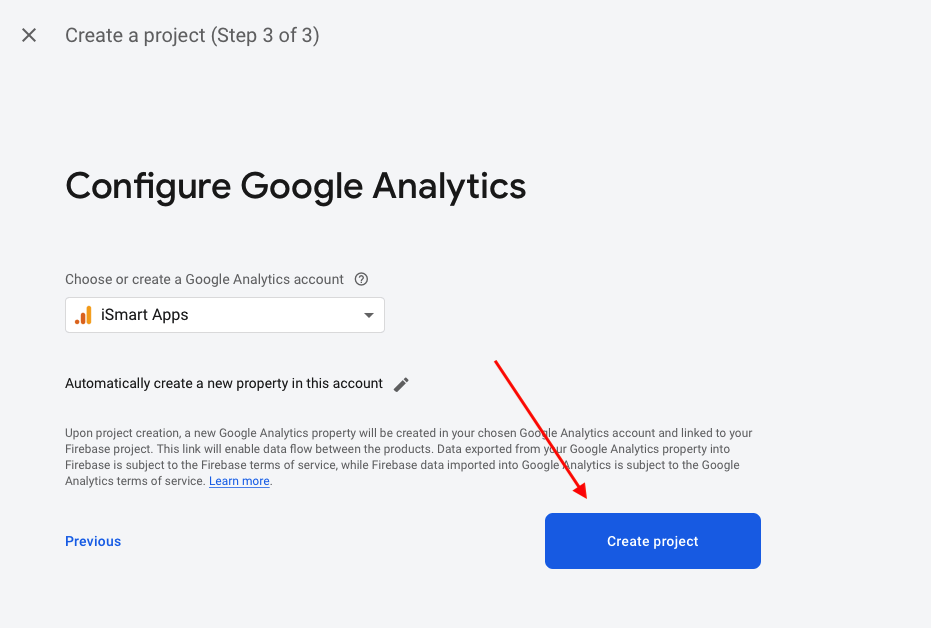
Select your Google Analytics account (or create a new account) and click the 'Create Project' button.
Note: If you don't want to link your project to a Google Analytics account, toggle the 'Enable Google Analytics for this project' switch off in Step 4 above.
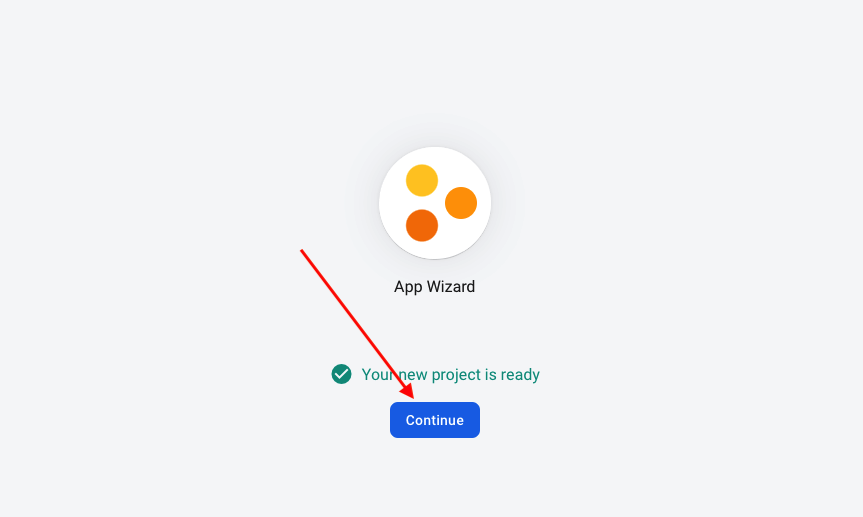
Please wait while your project configures, then select 'Continue'.

6. Select Platform |
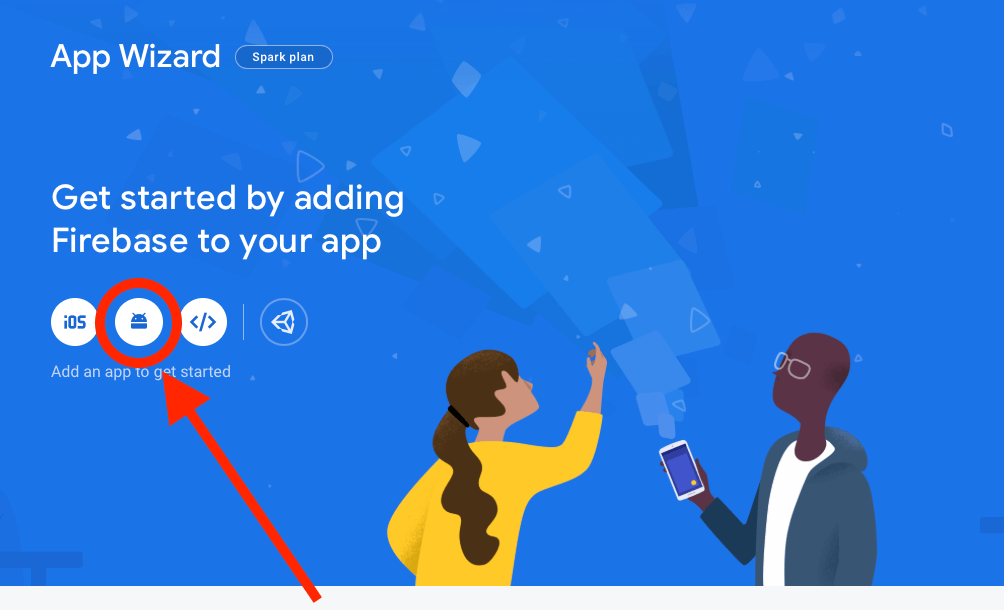
Select the Android icon as shown above.
7. Add Your Android Package Name / Register your App |
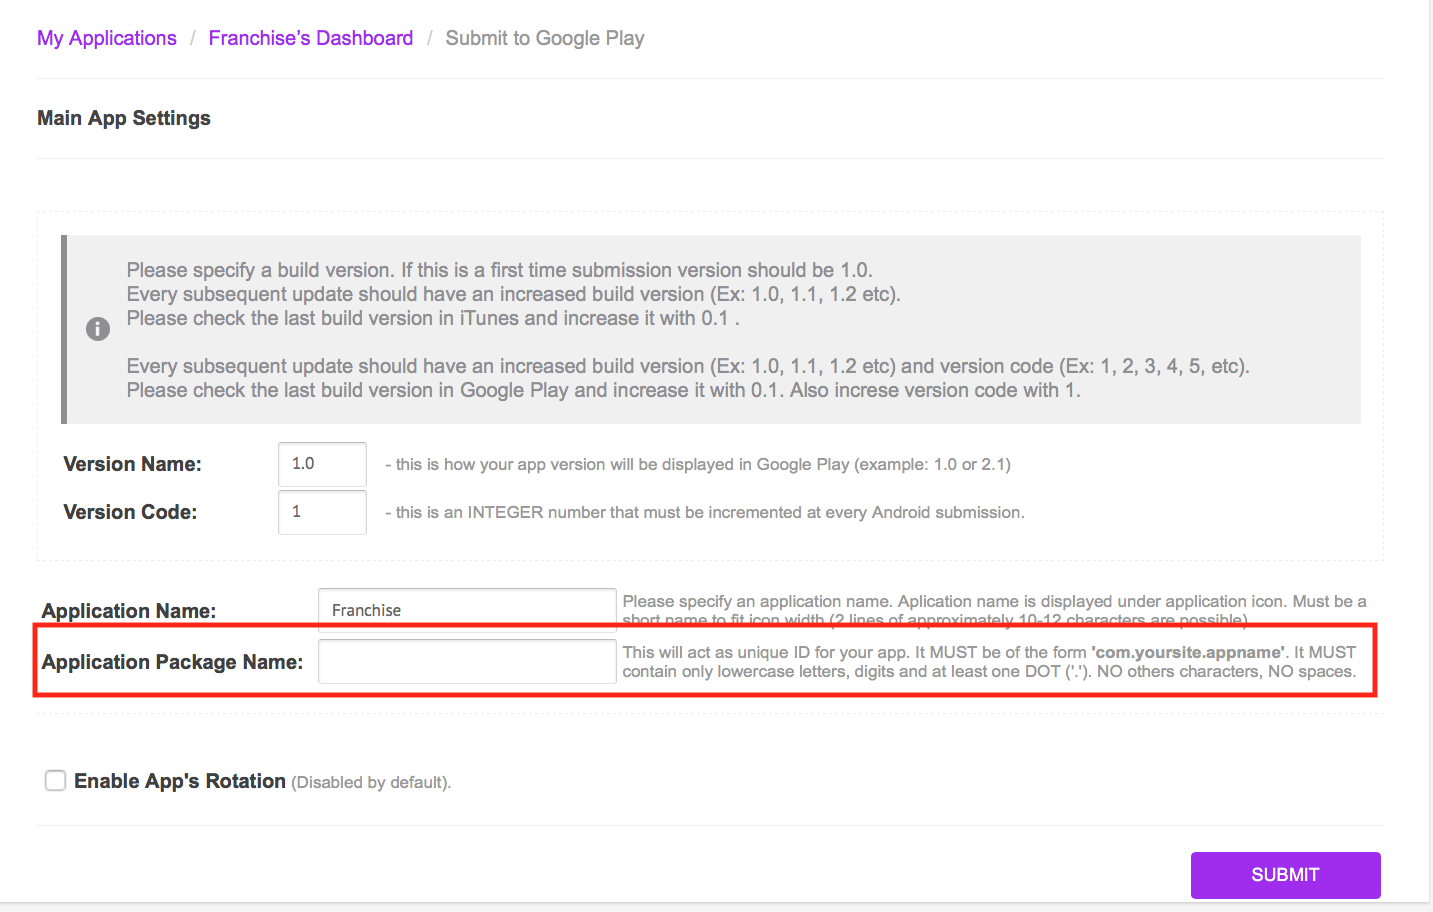
Note: It is important to get the 'Android Package Name' correct! Please read the instructions below.
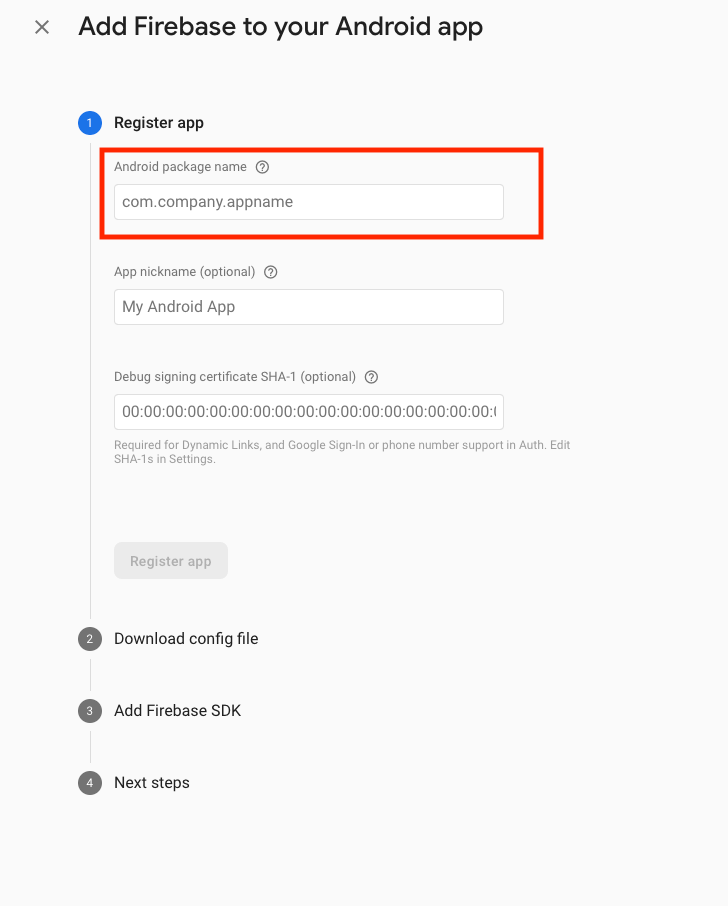
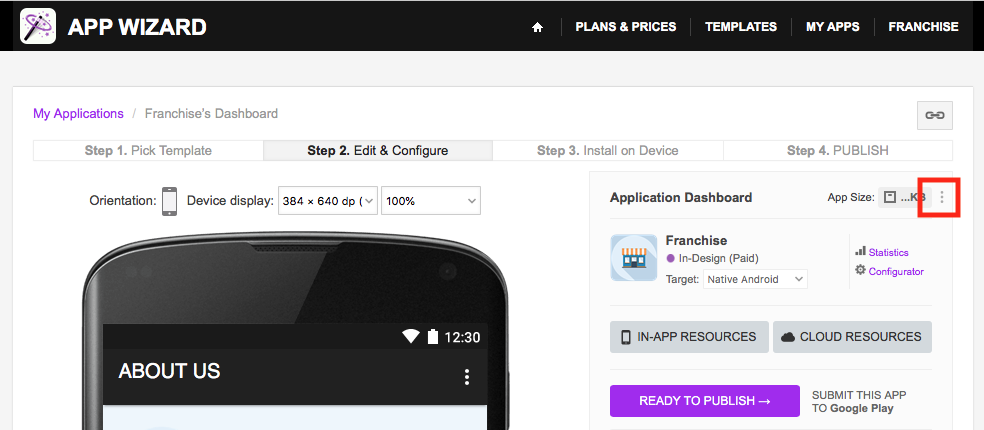
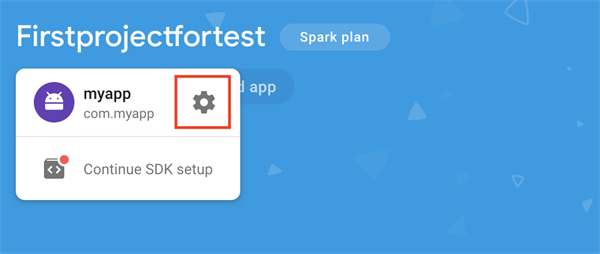
Enter the correct package name in the 'Android package name' field. The package name is found by clicking the three vertical dots on the App's Dashboard (as shown in the screenshot below).
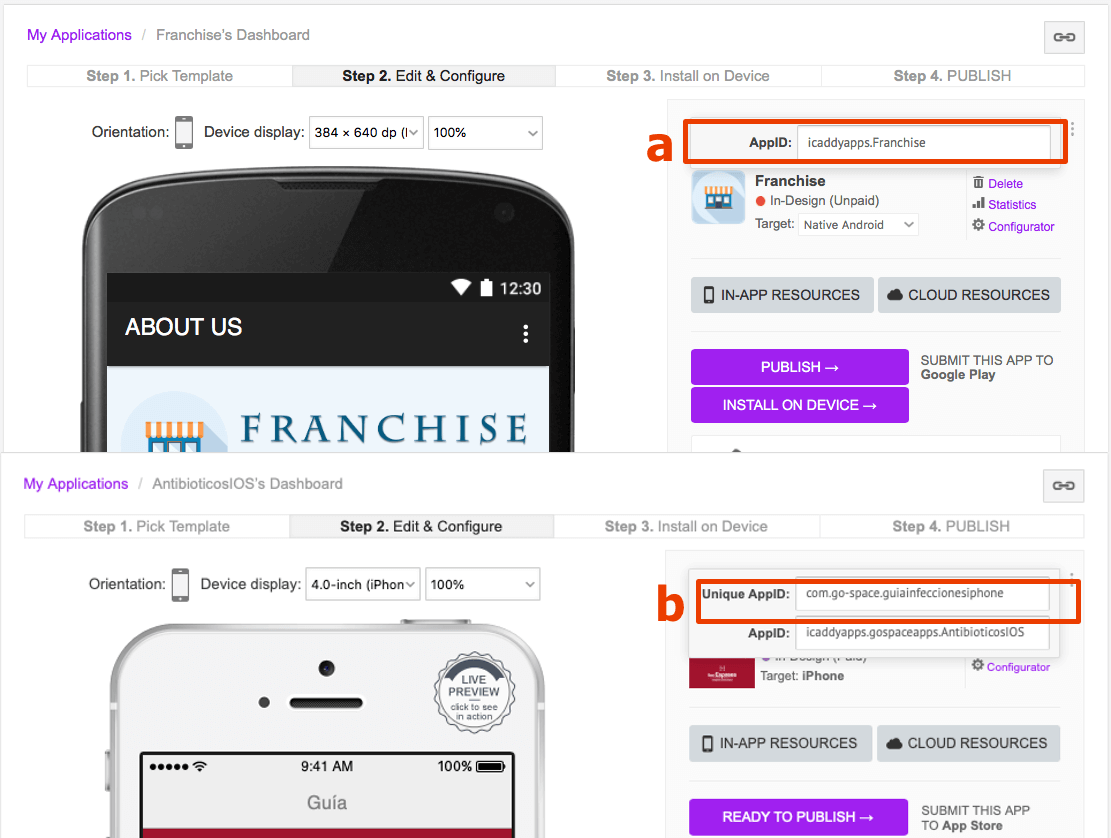
For a new unpublished App, the package name is comprised of the 'AppID' with com. added in front. For example, the package name for the 'Franchise' App (as shown in a. below) would be 'com.icaddyapps.Franchise'.
If the application has been previosuly submitted to Google Play, then the Android Package Name is the same as the 'Unique AppID' (as shown next to b. in the image below).
Note: The Package name is also set in App Wizard during the submission process for your application. It is important to ensure you use the same package name each time for the same App. This is described in more detail in Step 12 below.
8. Complete the Registration Process
After entering the Package Name, you can enter an App 'nickname' if preferred (this is optional).
Ordinarily, you can disregard the 'Debug signing certificate SHA-1' field - this is only required if you are enabling dynamic links etc.
Click 'Register App' to complete the App Registration process (as shown below).

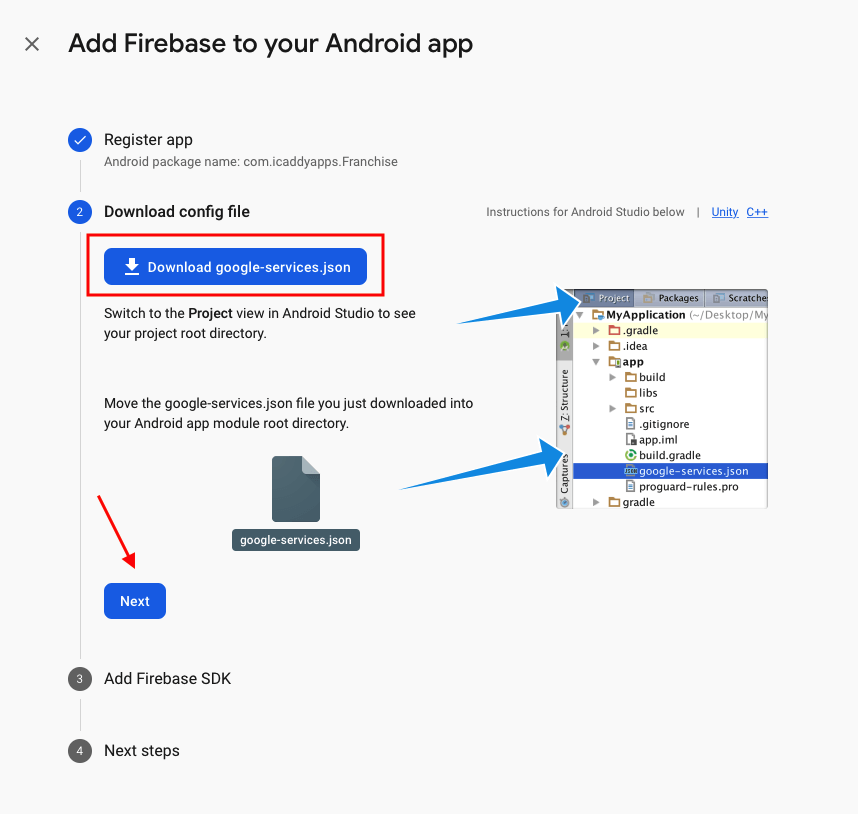
9. Download the 'google-services.json' file
Click the 'Download google-services.json' button (as shown below). Disregard all the text on the screen related to Android studio - this is not relevant to Apps built in the App Wizard platform.
Note: At this point you have successfully downloaded one of the two required files. Click 'Next' to continue.
Click 'Next'
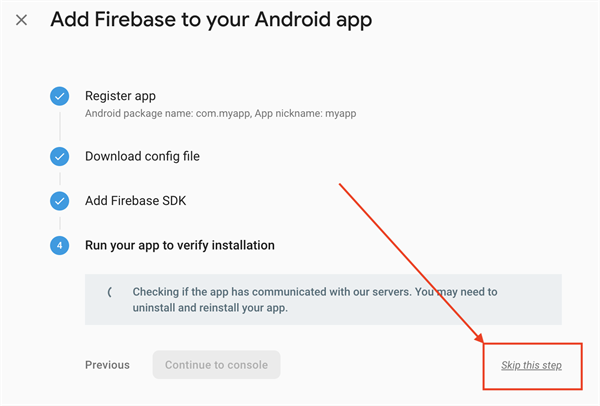
After clicking 'Next' in the previous step, a number of code windows and other information will appear below section 3 (Add Firebase SDK). Disregard these fields completely, they are not relevant to Apps developed in App Wizard. Simply click 'Skip' at the bottom of the screen. It will be checked after you will integrate fully the Firebase in your app.
10. Locate and download the 'Service Account File'
Next you will have to get the service-account file.
Navigate and select the settings gear icon as shown below.
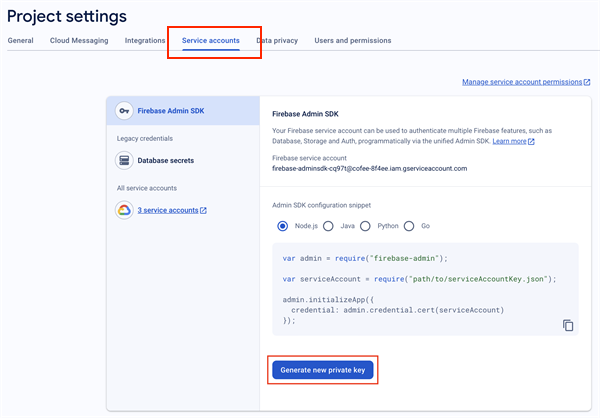
Then in the 'Service accounts' tab (top of screen) and in the 'Firebase Admin SDK' tab (on left of screen), click 'Generate new private key' (as shown below). Download and save this file on your computer. Please note that this file also needs to be uploaded in Service account field during submission process in the Push Notifications page in App Wizard (per the next step).
Note: You now have all you need to complete the set-up the new PN firebase requirements in your App Wizard account.
11. Add the 'google-services.json' and the 'service-account.json' Files to Your App
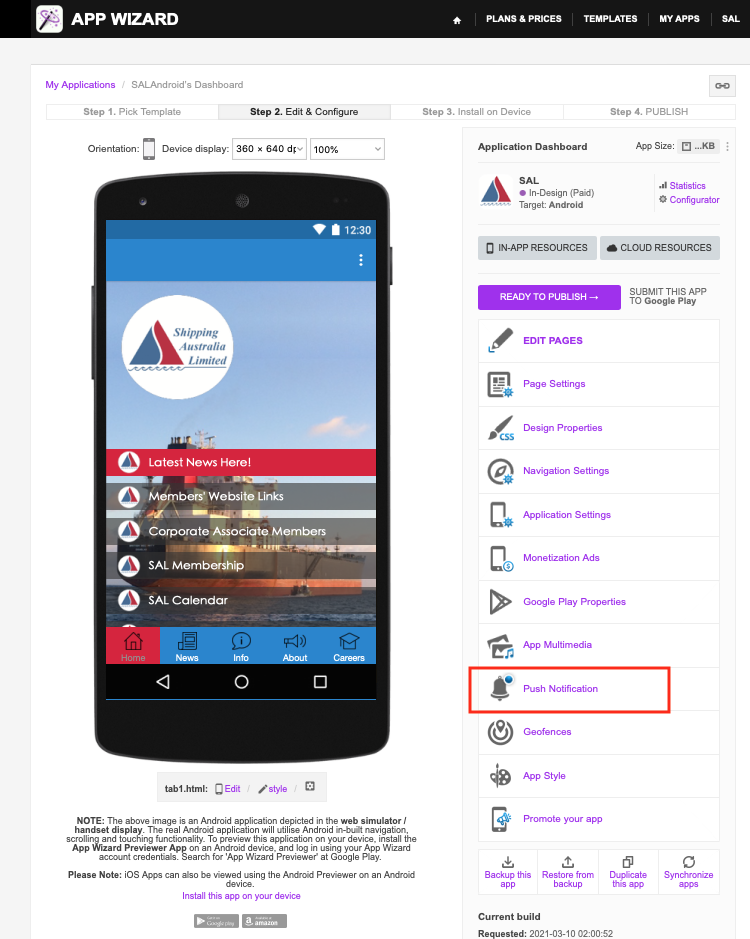
Log in to your App Wizard account and navigate to the App's Dashboard. Select 'Push Notifications' from the list of options available (as shown below).
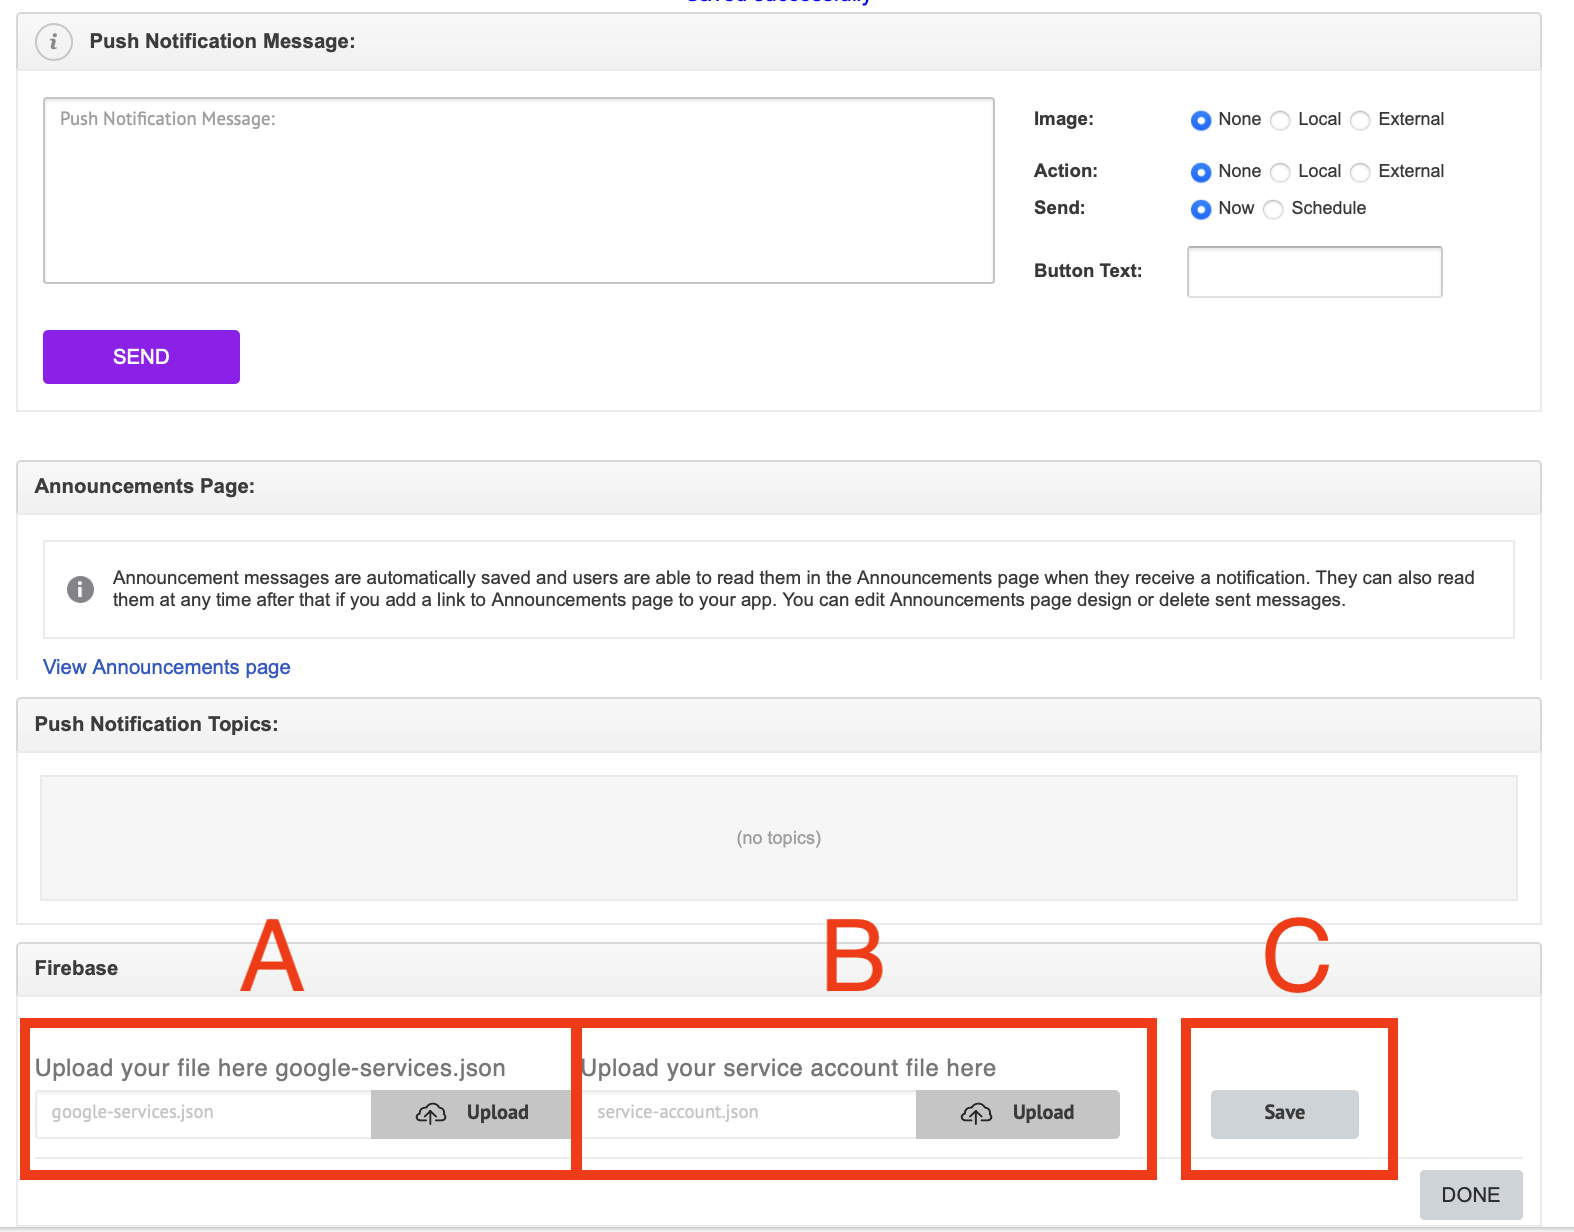
These are the last steps (refer to the image below):
a. Upload the google-services.json file as previously downloaded from Firebase
b. Upload the service-account.json file as previously downloaded from Firebase.
c. Select Save.
Note: Make sure the 'sevice-account.json' appears in upload field (B) after you have selected save. If it does not appear the first time you select save, select save again to make sure it is saved correctly.
You have now successfully setup Firebase Push Notifications in your App!
12. Add Your Android Application Package Name