How to Select a Template
App Wizard contains a wide range of App templates designed to suit any business or purpose. Simply select the template that best matches your requirements. The App Wizard build framework allows you to edit and customise each template to suit your preferred design or marketing profile.
Extra pages or particular features can be added to the selected template to enhance the App as required. Likewise, existing pages or features can be removed from any template if preferred. With App Wizard, you can build the perfect App to suit your particular needs.Step 1 | Step 2 |

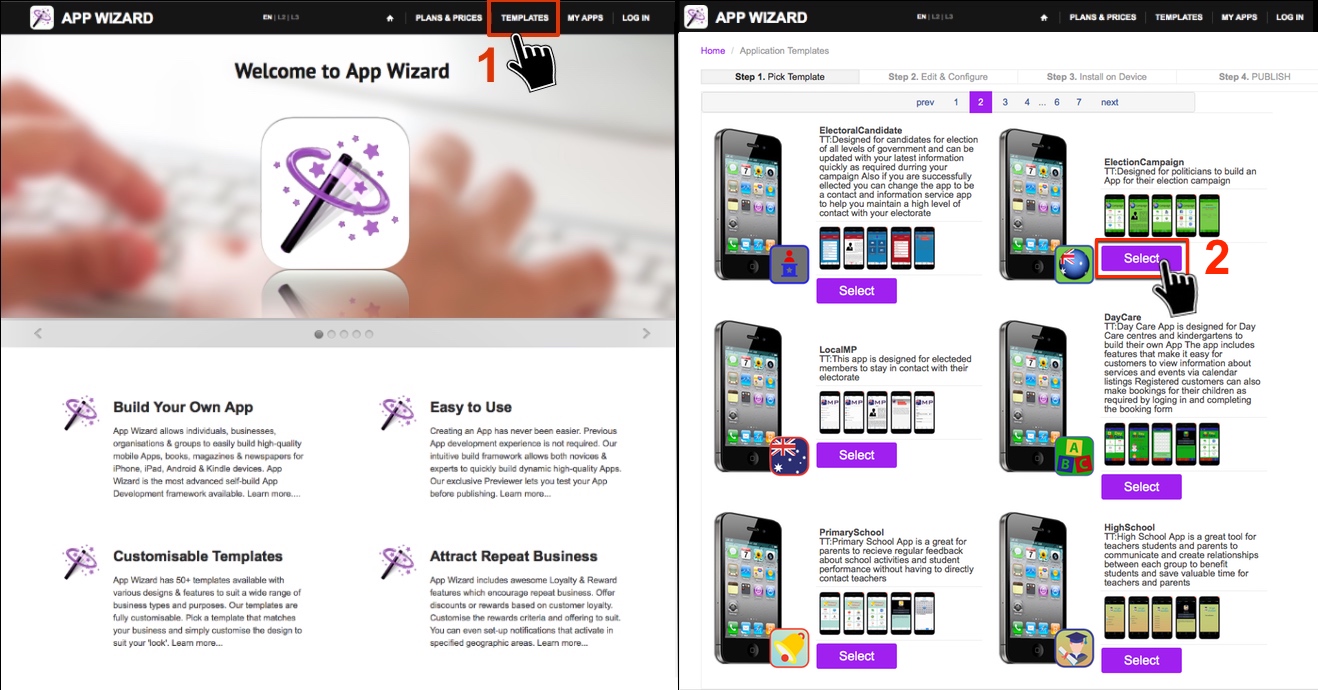
| Login to your account then on the 'Home' page, select 'Templates' at the top of the page. | Select your chosen App template. You can browse through the various template pages via the page numbers at the top or bottom of the page.
Once you've decided on your preferred template, click 'Select'. |
Step 3 | Step 4 |

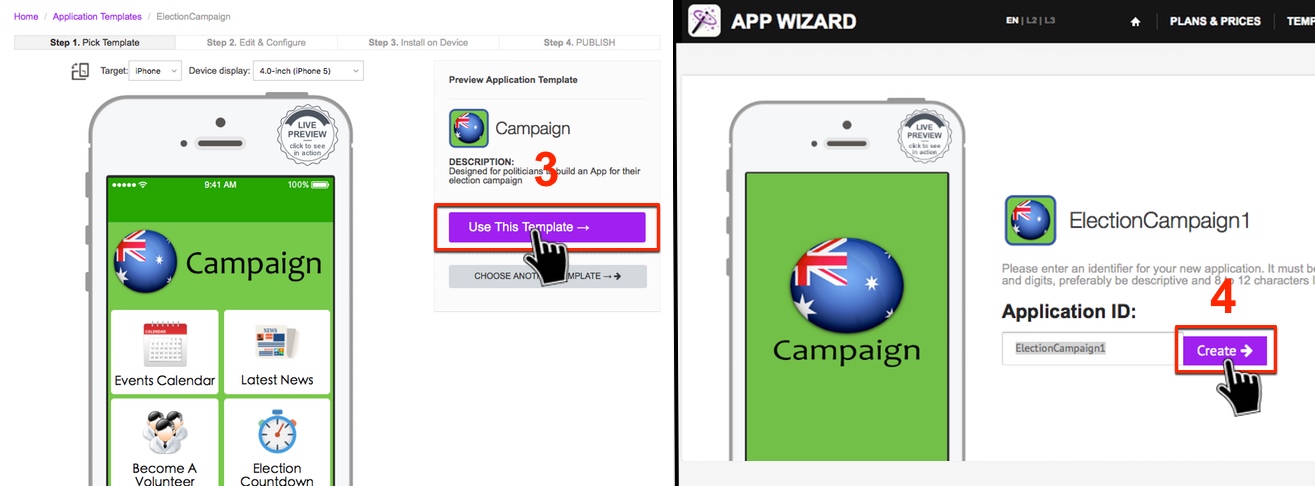
| Then select 'Use This Templates'. | Create an Application ID for your App. The Application ID must contain only letters and numbers (8-12 characters).
Note: Do not use Apple, Android or device trademarked names in your Application ID such as iPhone, iPad, iTunes, Google, Play Store, Android etc. Using trademarked names will result in your App being rejected during the publication process.
Once you've entered your preferred App ID, click 'Create'.
Note: The Application ID is not the name of the App listed on the App Stores. It is an internal discrete identifier only used to reference your App in the App Wizard system. |
Step 5 - Configuring Your App |

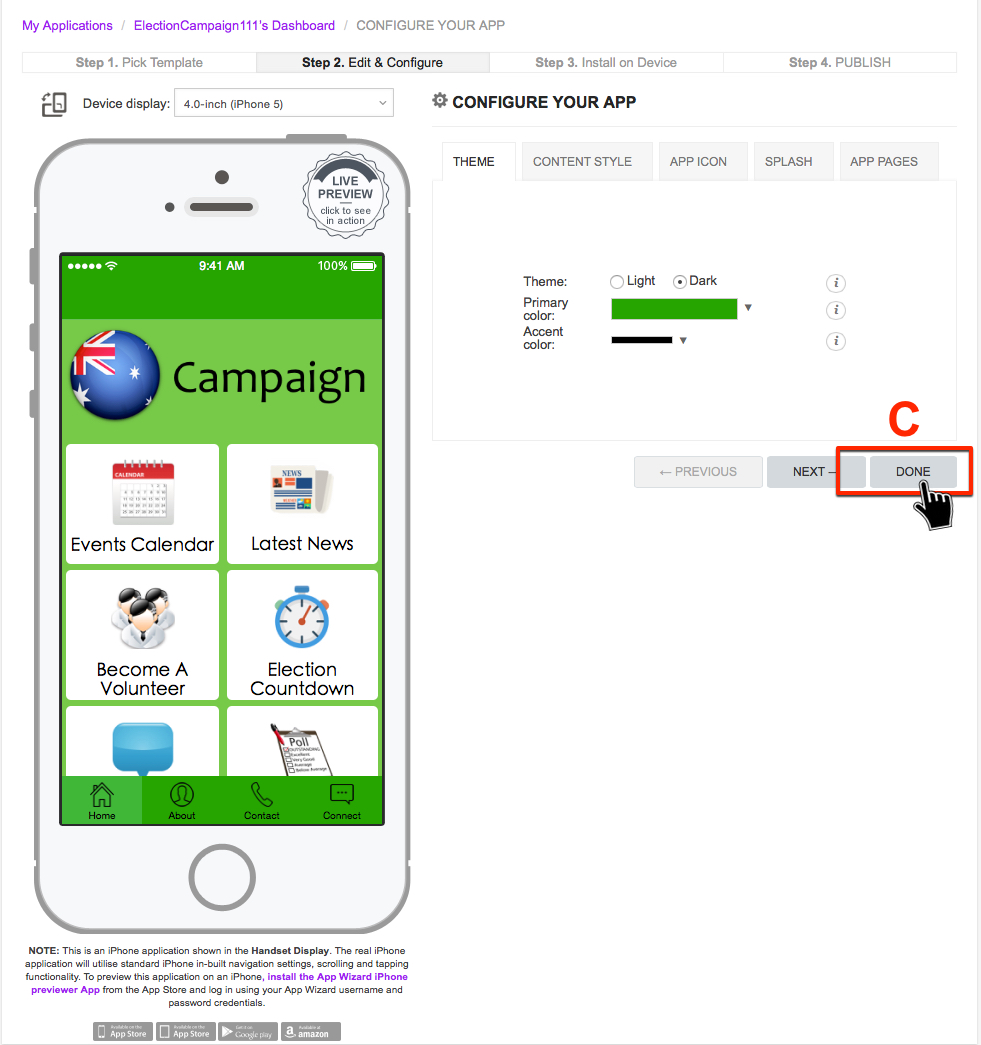
| Step 5A - Target Platform. Select 'Native iPhone' (for an iPhone App), or 'Native Android' (for an Android App) then click 'Next'.
| Step 5B - Navigation (Tab Type). Select 'Custom Tabs' then click 'Next'. Note: Custom Tabs provide greater flexibility by default. You can change the tab type at any stage during the build process if preferred. |

Note: All the configuration settings for theme / style / icon / splash / pages can be edited separately at any stage during the build process. You do not need to configure these settings during the initial configuration process described in this tutorial. Simply click 'Done' to complete the initial configuration. You can then start editing individual pages or configure various App settings from the App's main Dashboard (as shown in Step 6 below).
Step 6 |

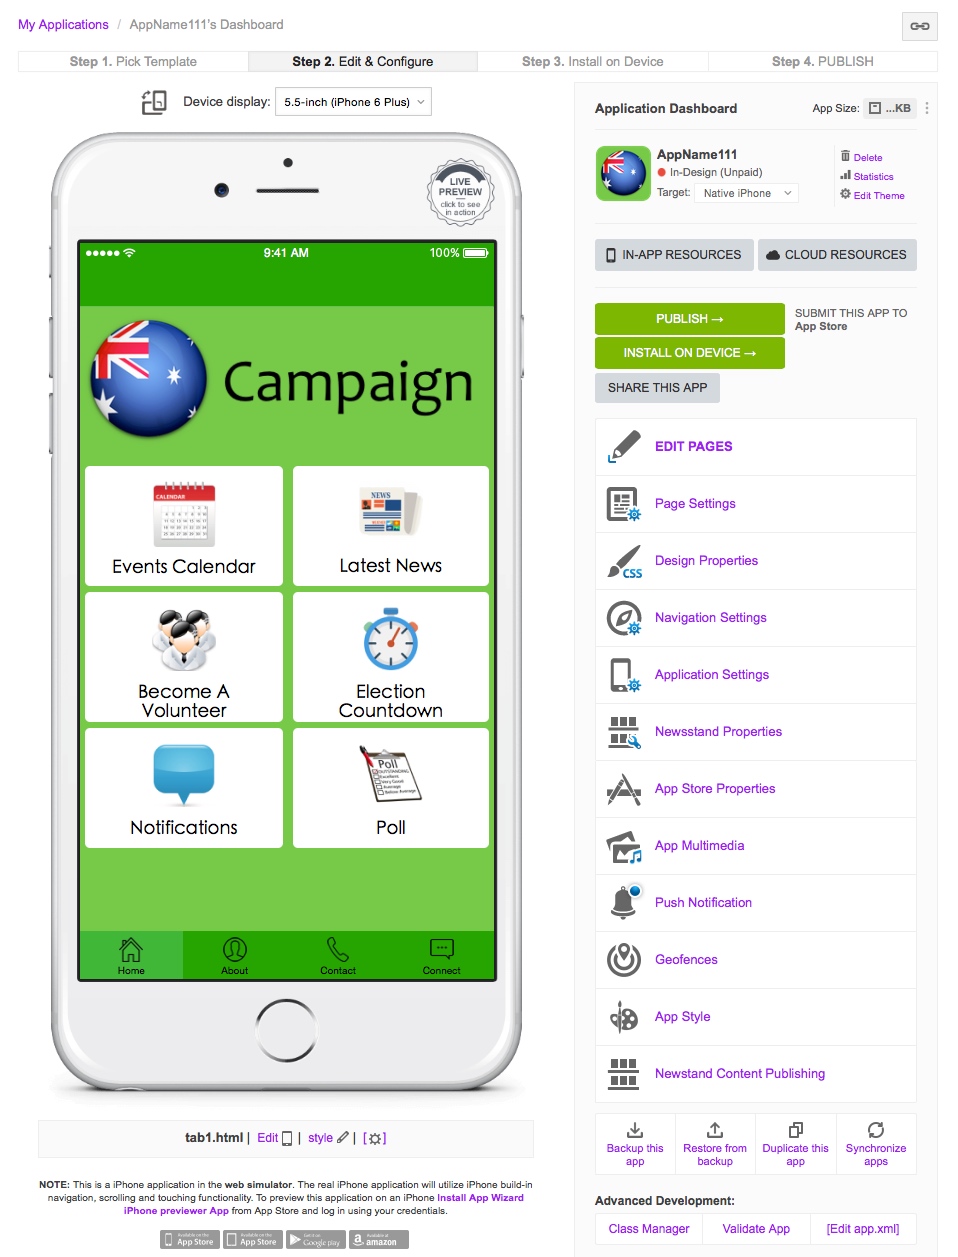
After clicking 'Done' in the previous step, the 'Dashboard' for your new App will open (as shown above). Each App you build has its own Dashboard.
The Dashboard is home base - from here you are able to edit your App comprehensively. Select any of the Settings / Options listed down the right hand side of the page to edit your App as required. See our help tutorials for detailed information about the various options and settings. Tip: We strongly recommend reading each tutorial before editing the respective settings.
To close an App's Dashboard, simply click 'My Applications' (in the 'Navigation Path' at the top left of the page) or click 'MY APPS' (in the Header at the top of the page) to return to the 'My Applications' list. All Apps you build will be listed in the 'My Applications List'. Select an App from the list to open its Dashboard. |
