How to upload Code Sign Files into your iOS App
This tutorial explains how to upload the 'code sign files' previously created for your iOS App.
To learn how to create these files, see the separate tutorial How to create Code Sign Files for your iOS App.
Uploading 'Code Sign Files' into your App |
1. There are three (3) key files which need to be uploaded into your App as part of the 'build request' process - the 'iOS Distribution Certificate', the 'Provisioning Profile' and the 'p12 Private Key (and password)'.
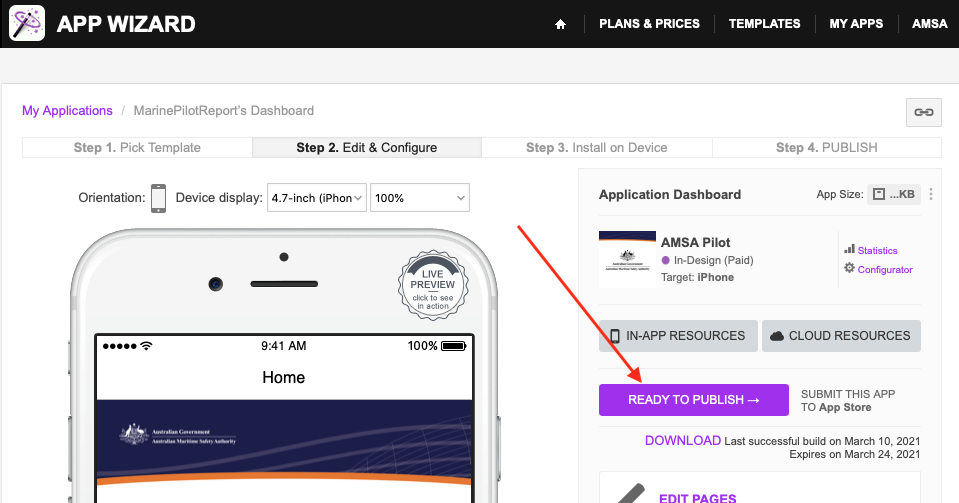
To start the process, go to your iOS App's Dashboard in App Wizard annd then click on 'Ready to Publish' (as shown below).
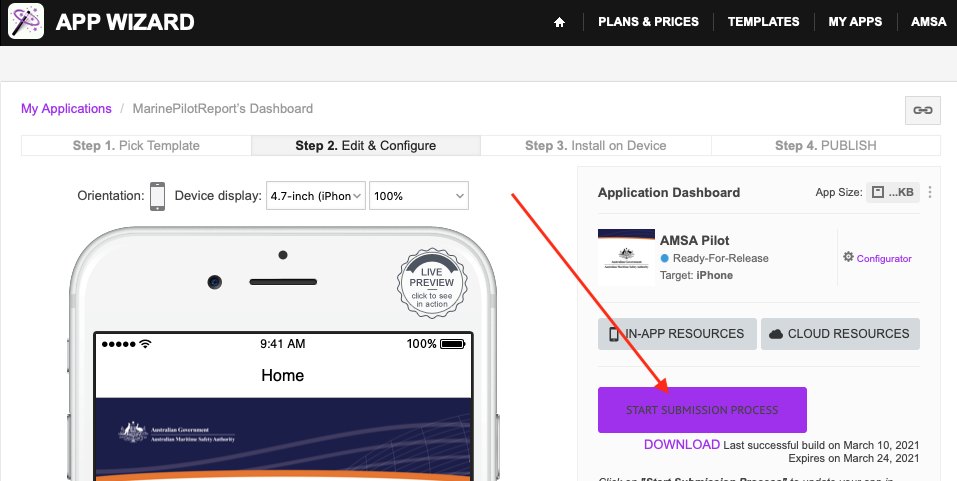
2. Next, click the 'Start Submission Process' button (per below).
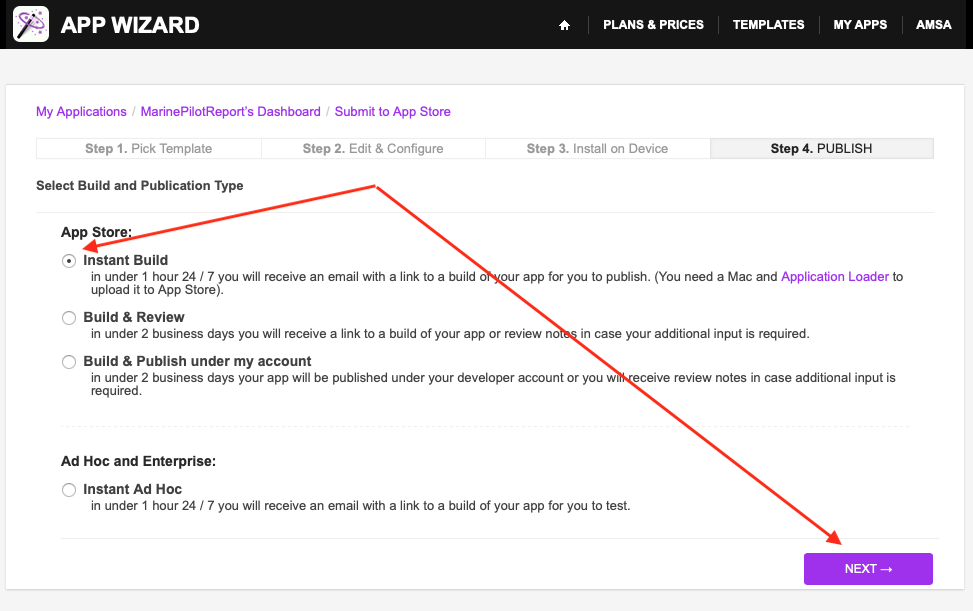
3. Next, select the 'Instant Build' option, then click 'Next' (per below).
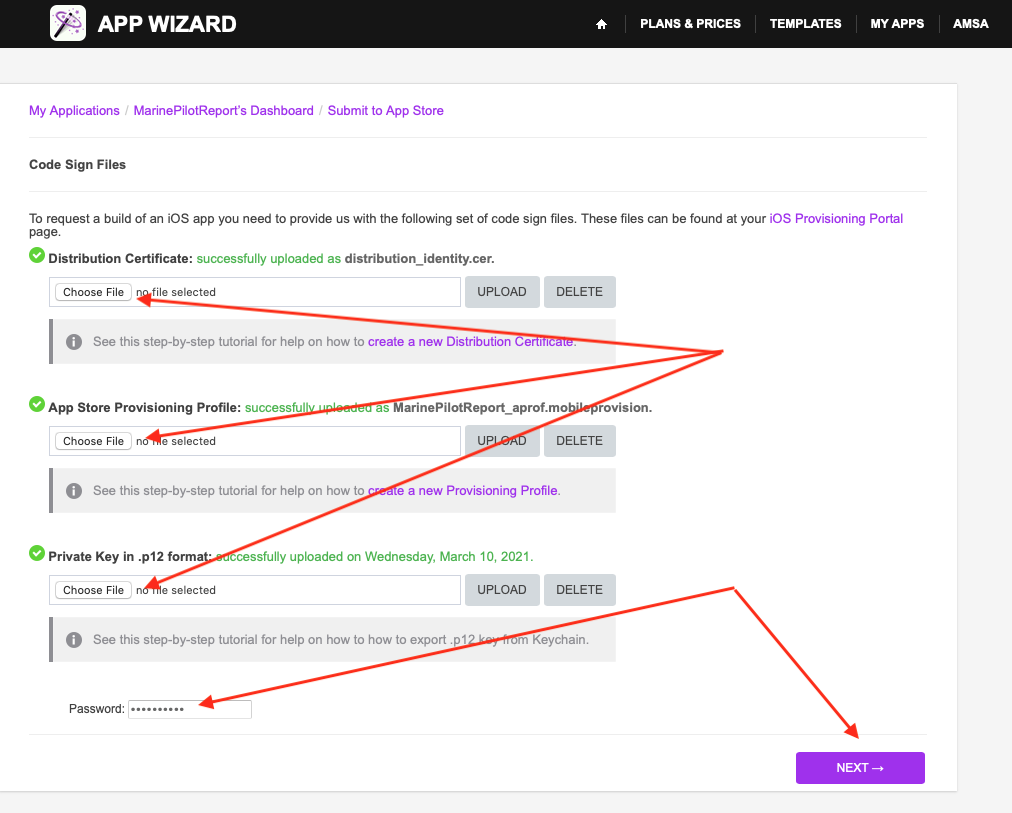
4. In the window which opens, click 'Choose File' under 'Distribution Certificate' (as shown below). Locate the respective iOS Distribution Certificate previously created for this App on your computer. Select the file then click the 'Upload' button. After the file is succesfully uploaded, a confirmation message will be displayed indicating that the file was "...successfully uploaded as distribution_identity.cer."
Note: Do not be concerned that this name does not match the name of your iOS Distribution Certificate. This is the default confirmation message.
Next, click 'Choose File' under 'App Store Provisioning Profile' (as shown below) and upload the respective Provisioning Profile (.mobileprovision file) previously created for this App. After the file is succesfully uploaded, a confirmation message will be displayed indicating that the file was "...successfully uploaded as .......". Again, do not be alarmed if the file name in the default confirmation message does not match the name of the file you uploaded.
Next, click 'Choose File' under 'Private Key in .p12 format' (as shown below) and upload the respective 'p12 Private Key' previously created for this App. After the file is succesfully uploaded, a confirmation message will be displayed.
Enter the password for the 'p12 Private Key', then click 'Next'.
Important: The p12 password needs to be the last thing entered before clicking 'Next'. Make sure the p12 password entered is correct (including any case sensitivity). If the App has previously been published, make sure you re-enter the p12 password again after uploading a new Private Key, before clicking 'Next'. Make sure you re-enter the p12 password again if you re-upload any of the code sign files on this page. Make sure that the password entered has the correct number of characters. After entering and checking the p12 password, then click 'Next'.
5. On the screen that opens next, you can upload the Push Notification Certificate for the App. If you do not want Push Notifications enabled, select 'I want Push Notifications disabled', then click 'Next'.
To enable Push Notfications in your iOS App, select 'I want Push Notifications enabled' as shown below.
Next, click 'Choose File' under 'Please upload your APN certificate'. Select the Push Notification (.cer) file on your computer previously created for this App. Click 'Upload' to upload the file.
Note: After uploading the .cer file, do not be concerned if the name indicated does not match the name of your iOS Distribution Certificate. This is the default confirmation message.
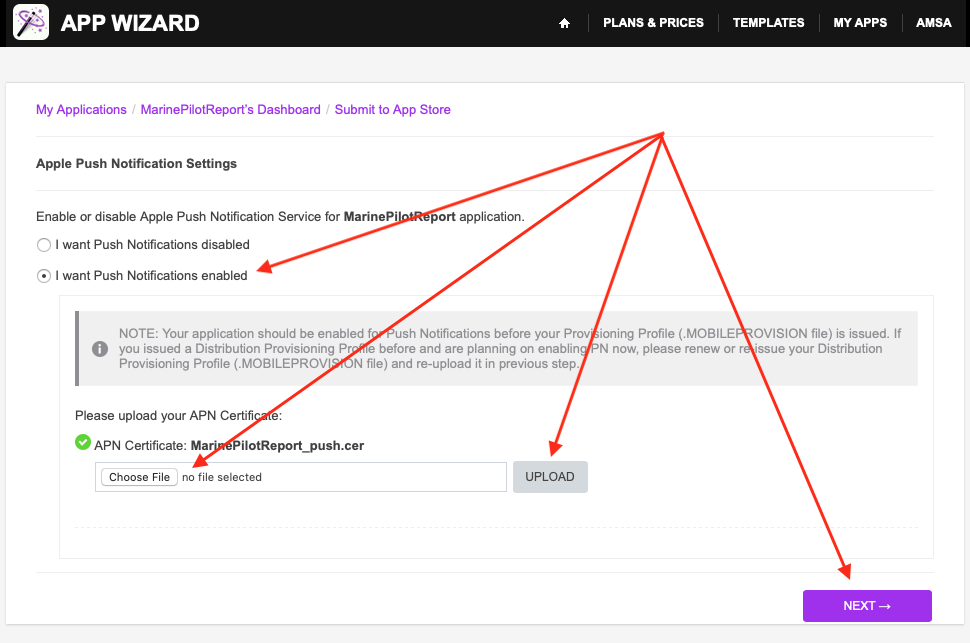
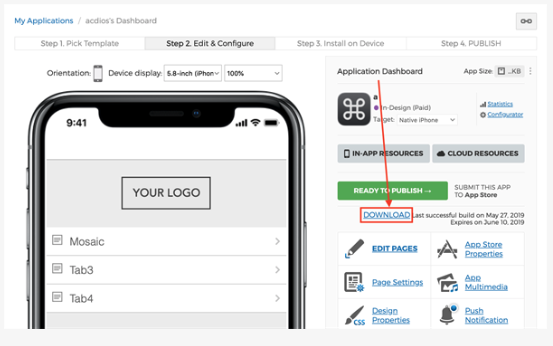
6. Click Next to finalise the process and proceed with the 'build request' submission. Once the App has been successfully built, you will receive an email message confirming the availability of the 'binary' (.ipa) file, along with a link to download the binary. Alternatively you can go back to the App's dashboard and download the binary from there (as shown below).
