How to Edit 'App Store' Properties & Multimedia

The following tutorial describes how to edit the Apple 'App Store' Properties and 'App Multimedia' images for your App. This information is applicable to Apps developed for Apple iPhone / iPad devices only. Please refer to How to Edit 'Play Store' Properties & Multimedia to edit these settings in Apps developed for Android devices.
Step 1 - Select App Store Properties |
|
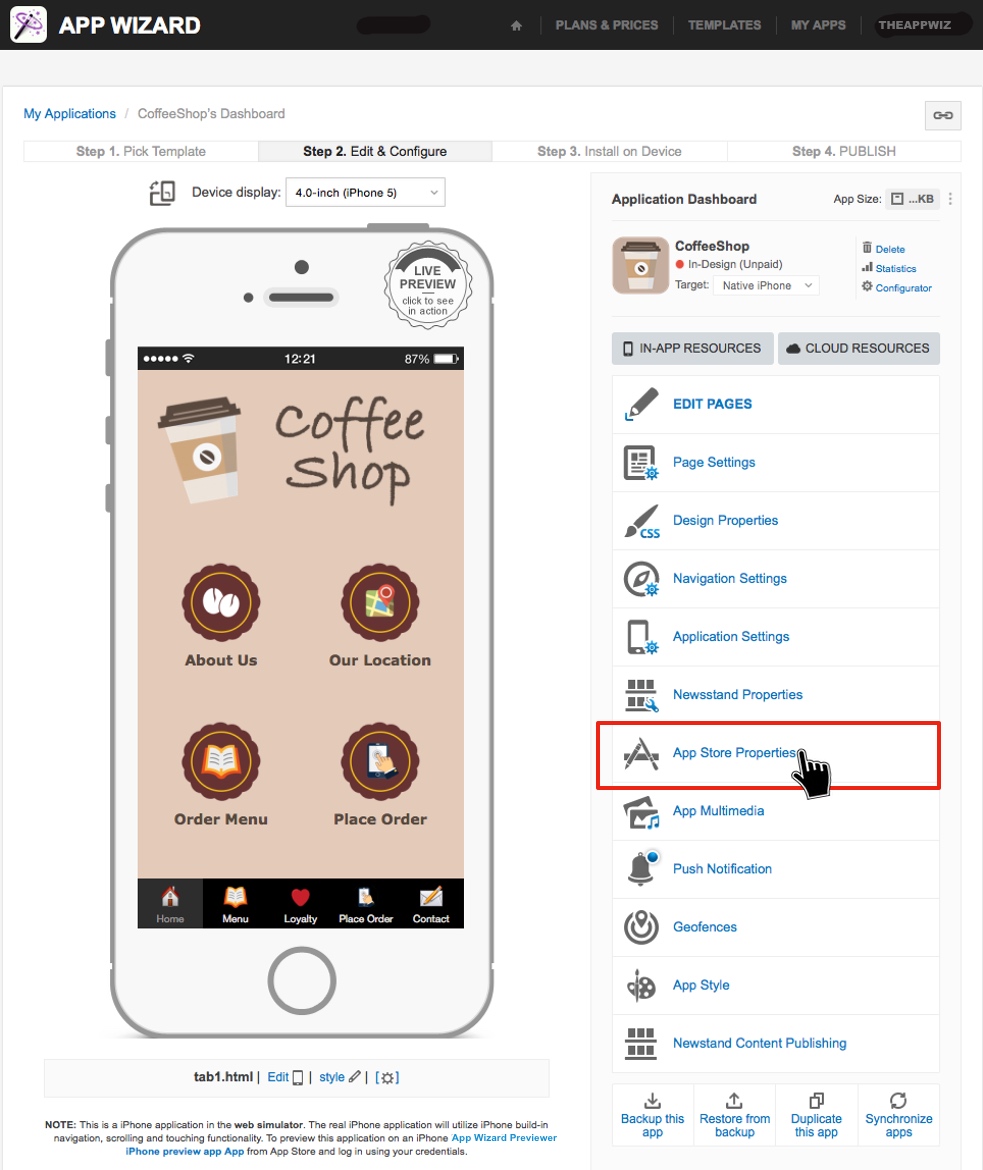
From your App's 'Dashboard', select 'App Store Properties' on the right-hand side.
|
Step 2 - App Store Properties |
|
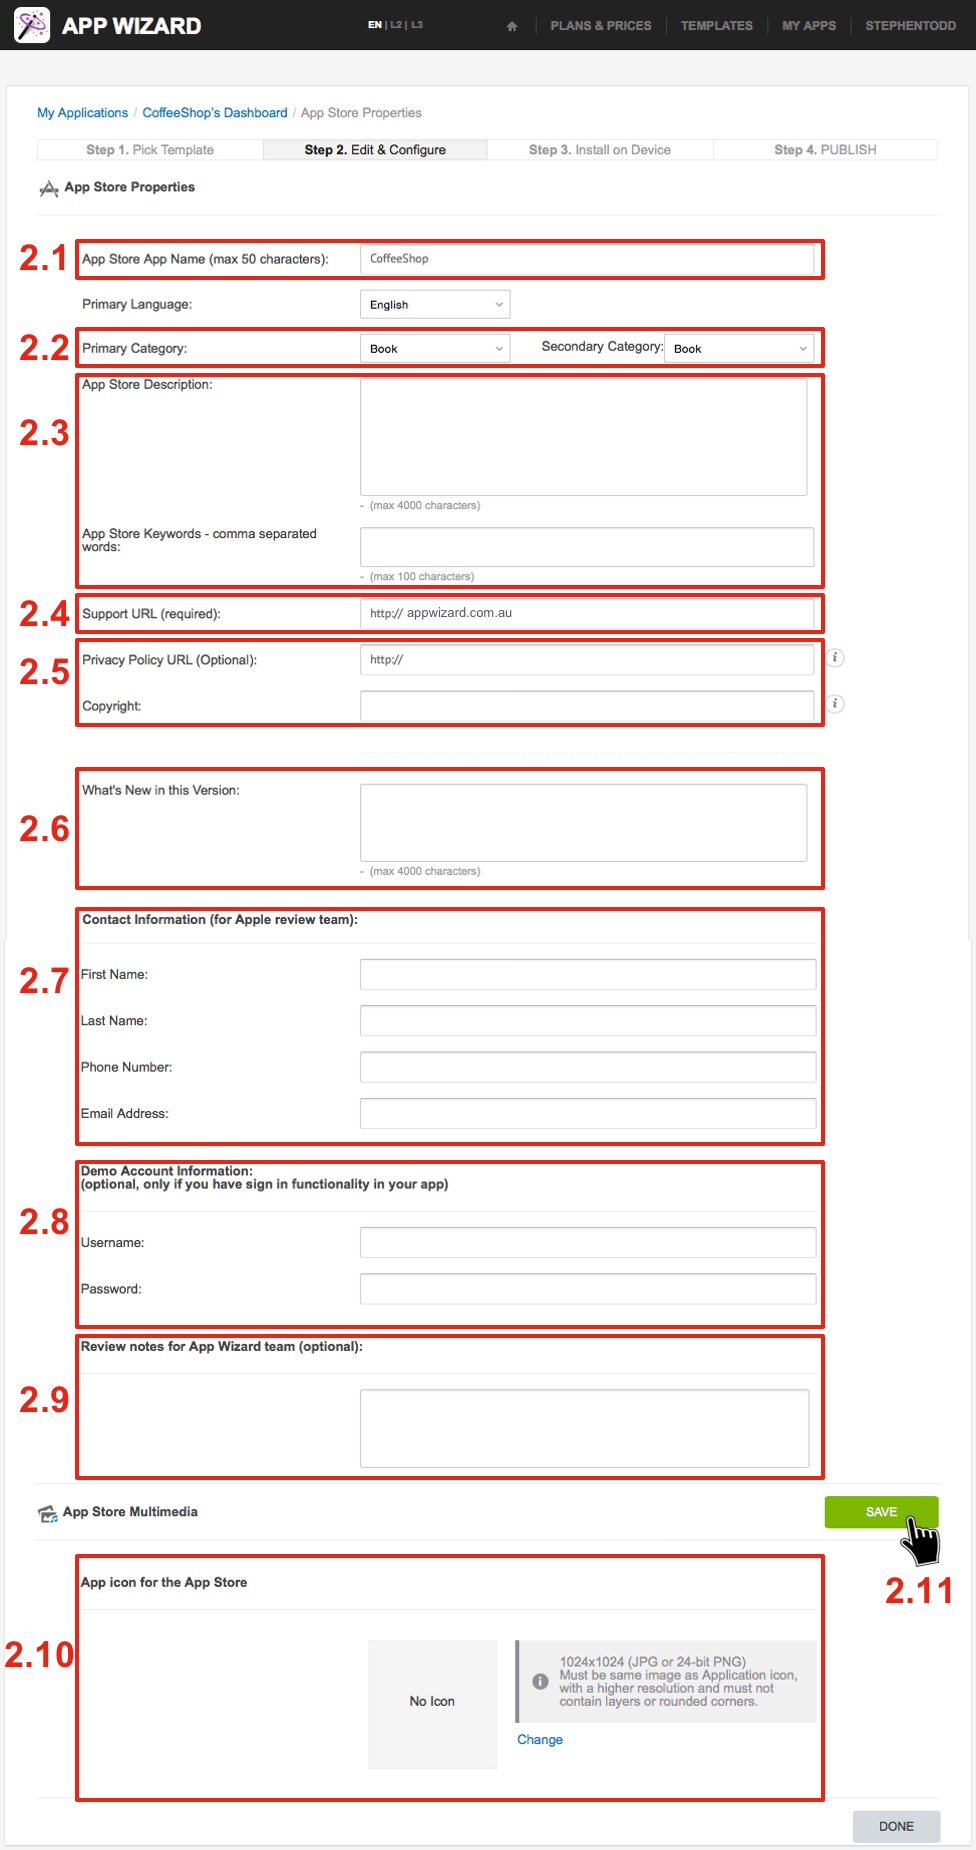
2.1 App Name. In the 'App Store Properties' screen, insert the Name for your App (e.g. Willow Vale Dog Grooming) - spaces are allowed. Note: This is the name that will be displayed in the Apple 'App Store'. The name chosen for your App should not be generic - it should be unique to your individual business to avoid publishing complications (where another App may already exist under the same name).
Note: This image must be a 1024 x 1024 pixel .png file only. Other sizes or image file types will be rejected. Remember: Image file names are to contain only numbers, letters and underscores with NO SPACES (e.g. Example_App_Icon_2.png).
|
Step 3 - Select App Multimedia |

|
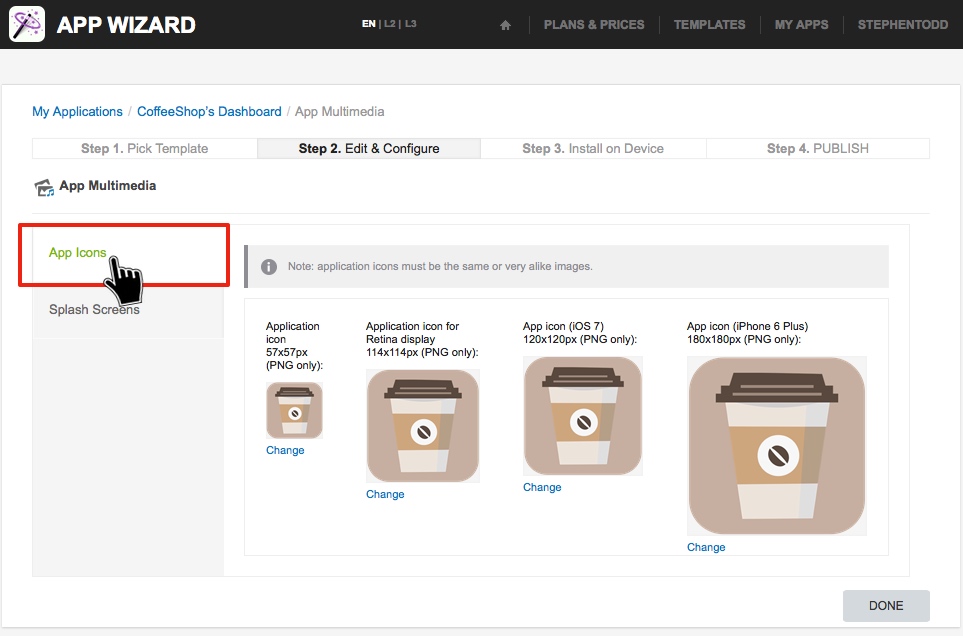
From the App's 'Dashboard', select 'App Multimedia'.
|
Step 4 - App Icons |
|
App Icons. On the App Multimedia screen, select the 'App Icons' tab on the left. The different-sized 'Application icons' uploaded in this section are used to display each image on Apple devices with different screen sizes and/or resolution (e.g. iPhone 4 or iPhone 5 etc.). To add a new icon, select 'Change' below each 'Application icon' and add a new image as required. Note: Upload the desired image and resize as required for each icon. The sizes required are indicated for each 'Application icon'. See below for guidance about resizing icon images. All icon images must be .PNG ONLY. Remember: Image file names are to contain only numbers, letters and underscores with NO SPACES (e.g. Example_App_Icon_2.png). Design: We recommend using borderless square images without rounded corners, noting that all 'Application icons' are cut by Apple with a different corner radius for each phone type. Also, it is important to note that all 'Application icon' images should extend to the edge of the canvas and must not contain a clear background layer (Alpha Channel), as any clear background space will be displayed as solid black (both in the App Store and on Apple devices). Remember: Image file names are to contain only numbers, letters and underscores with NO SPACES (e.g. Example_Splash_Screen_Image_3.png).
|
Step 5 - Resizing an App Icon |
|
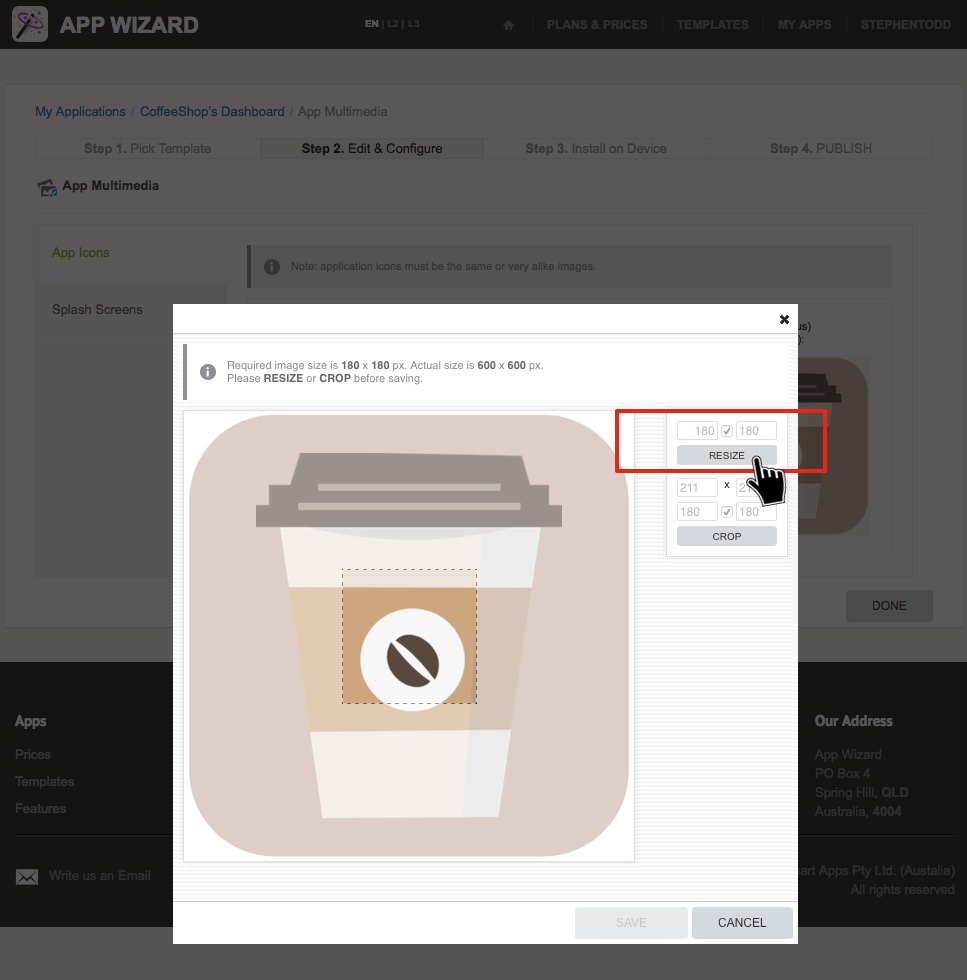
After uploading an icon image, you are able to resize the image (and/or crop the image) as required. This feature makes it easy to use the same icon image for all 'Application Icons' for consistency.
Simply make sure the correct dimensions are indicated in the corresponding field, then click 'RESIZE' (and/or 'CROP'). The area of the icon image which will be displayed (after applying the intended changes) is highlighted as a guide.
When finished, click 'SAVE'. |
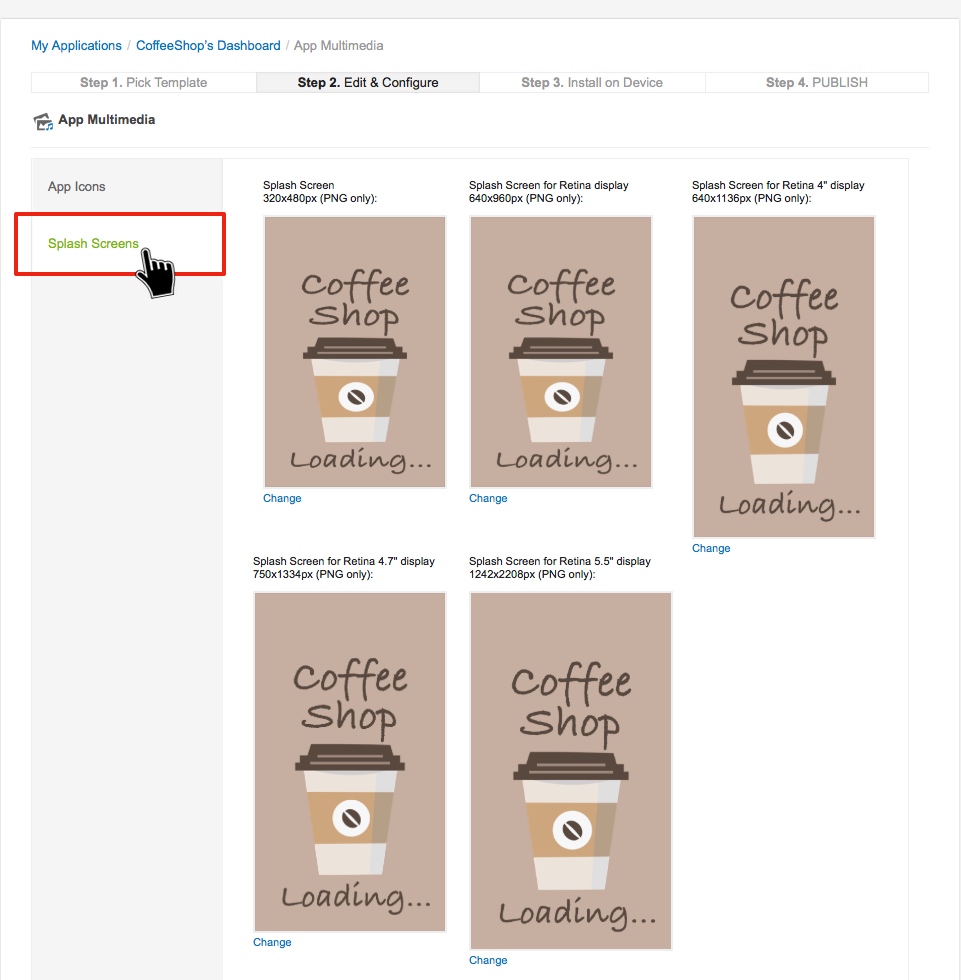
Step 6 - Splash Screens |
|
Splash Screens. The different-sized 'Splash Screens' uploaded in this section are used to display each image on Apple devices with different screen sizes and/or resolution (e.g. iPhone 3 or iPhone5 etc.). Click 'Change' below each 'Splash Screen' and add a new image as required. Note: Upload the image and resize to fit the required dimensions. See below for guidance about resizing a Splash Screen. The dimensions for each Splash Screen are indicated above each image. The image files must be .PNG ONLY. Remember: Image file names are to contain only numbers, letters and underscores with NO SPACES (e.g. Example_Splash_Screen_Image_3.png). Further Info: A 'Splash Screen' is displayed every time an App is opened on a mobile device. When an App is initially downloaded and viewed for the first time on the App Wizard Previewer, the 'Splash Screen' remains visible for an extended period of time whilst the App loads. The 'Splash Screen' may apppear slightly stretched on initial viewing, however it will then be displayed at the correct size each time the App is previewed. When finished, click 'DONE' to return to the App's 'Dashboard'. You can click 'DONE' (to save your work) at any stage while updating 'App Multimedia' and return to complete later. |
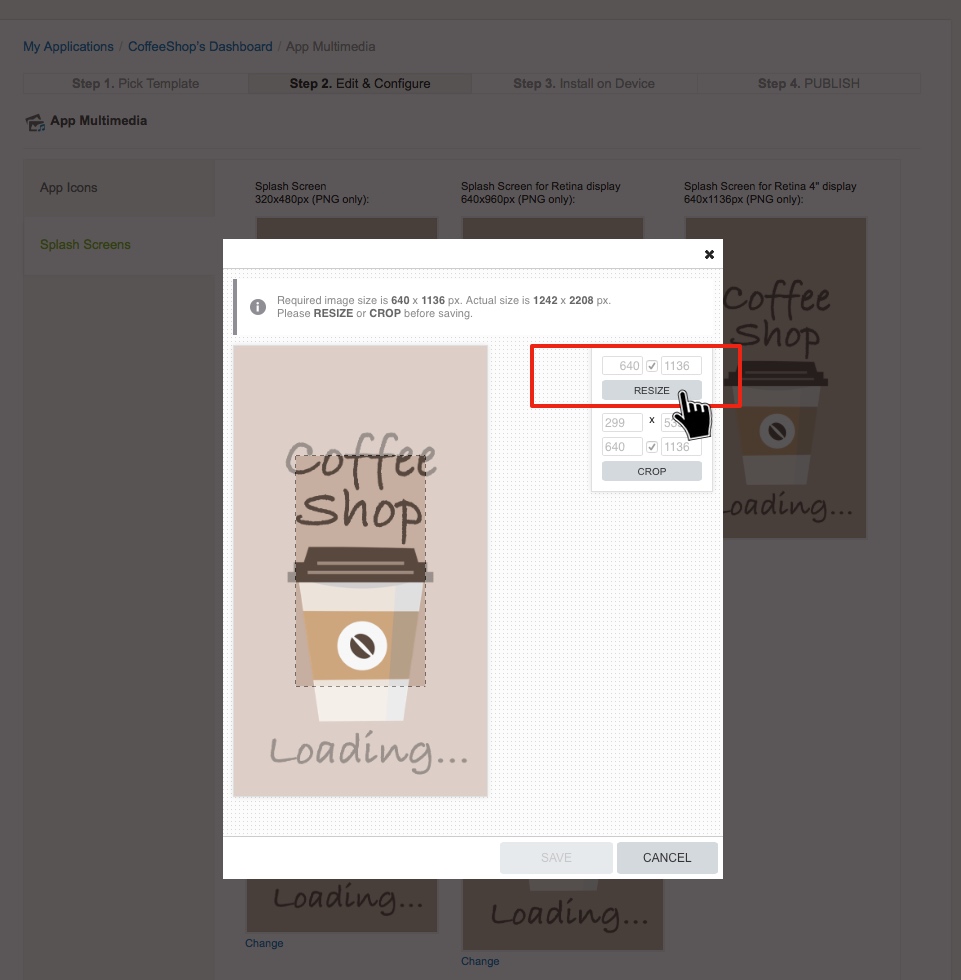
Step 7 - Resizing a Splash Screen |
|
After uploading the Splash Screen image, you are able to resize the image (and/or crop the image) as required. This feature makes it easy to use the same Splash Screen image for consistency.
Simply make sure the correct dimensions are indicated in the corresponding field, then click 'RESIZE' (and/or 'CROP'). The area of the icon image which will be displayed (after applying the intended changes) is highlighted as a guide.
When finished, click 'SAVE'. |

