How to Convert Your App's Platform

Each App Wizard App template can be built for iPhone and Android devices. The device type defines the 'target platform' (i.e. iPhone or Android).
App Wizard templates are mainly configured for the iPhone target platform by default. We recommend using the iPhone target platform for your primary build (and then converting the App to Android). Alternatively, you can build your App for an Android device and then convert to iPhone. Either way, our build framework provides easy conversion from one target platform to the other. The conversion process minimises the amount of build-effort required to create an App for both target platforms. This means you get two great Apps for the work of one! There are two main requirements to convert an App from one platform to the other. The first step is to duplicate your (completed) App. To learn how to duplicate an App, go to How to Duplicate Your App.After duplicating your App, simply edit the navigation settings for the Android version. This process is described below.
Step 1 |

|
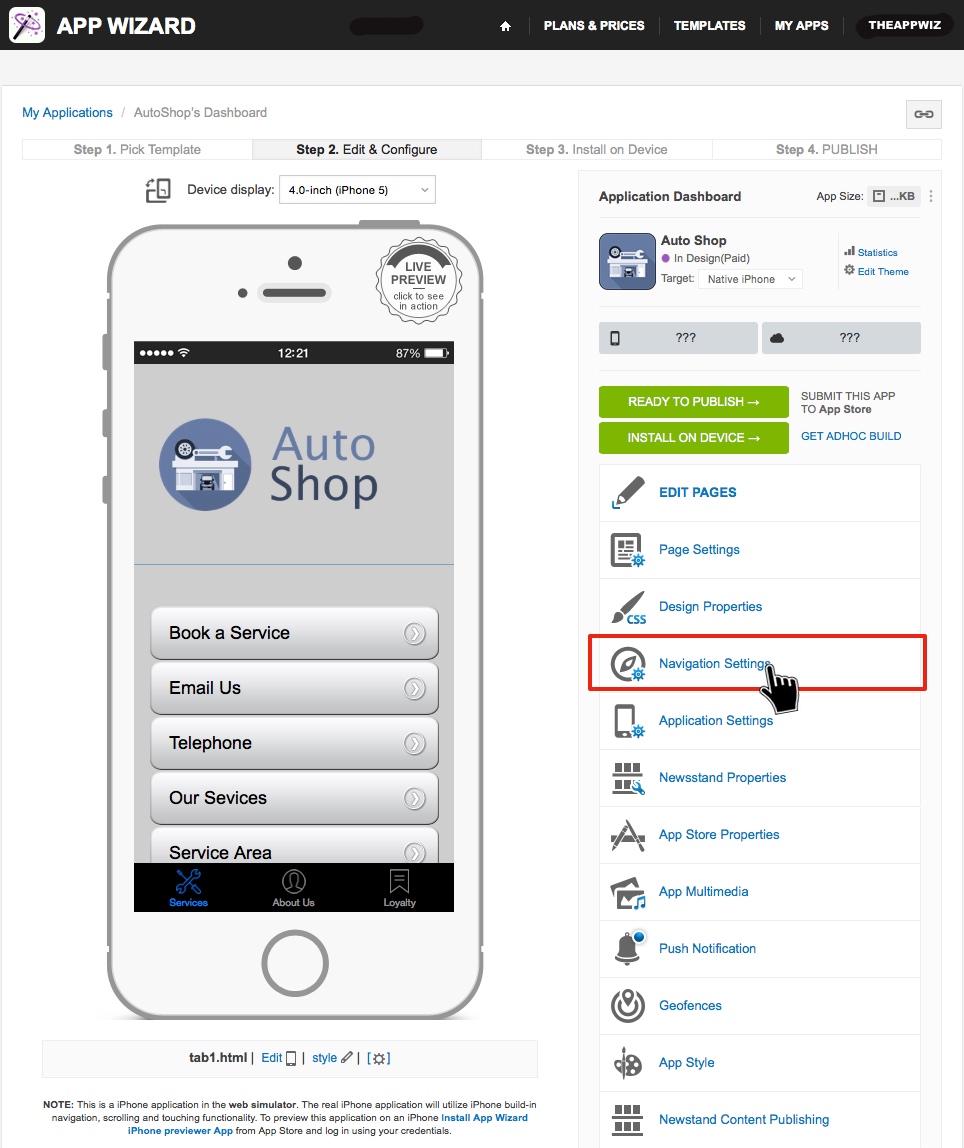
From the App's 'Dashboard', select 'Navigation Settings' (as shown above).
|
Step 2 |

|
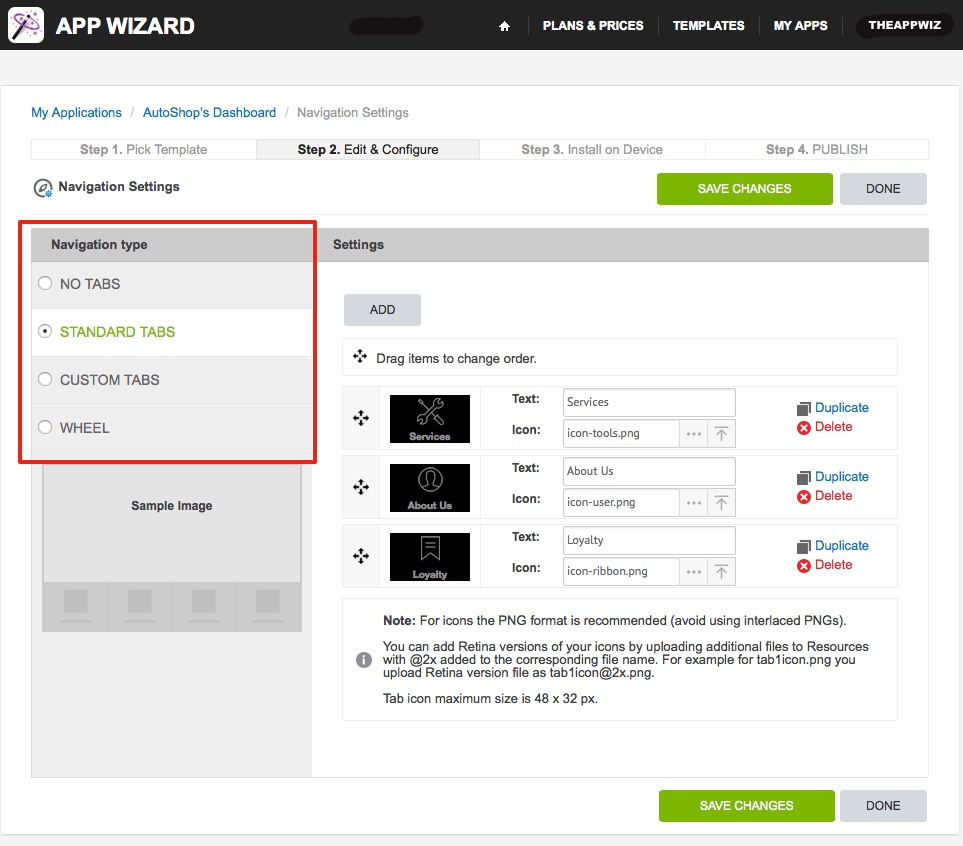
In Navigation Settings you have the option to select 'Standard Tabs' (selected above), 'No Tabs', 'Custom Tabs', Or 'Wheel'. The use of the 'No Tabs' option should only be selected where the App has been specifically
designed as a 'No-Tab' App.
Ordinarily, the tab configuration option chosen should mirror the same tab configuration in the primary App (i.e. if you have 'Standard' tabs configured in the primary App, select 'Standard' tabs for the other target platform). If preferred, you can set up a totally different tab configuration for each target platform. Further information about editing the 'Navigation Settings' is included in the relevant Dashboard Tutorial, see Navigation Settings.
The Standard Tabs option allows you to change the icon and the text which appears on the tab (via the Navigation Settings page as shown above), however you can also change the background colour of standard tabs in the 'Style Settings' from the App's main dashboard. Information on 'Custom Tabs' is provided in the next step below. |
Step 3 |

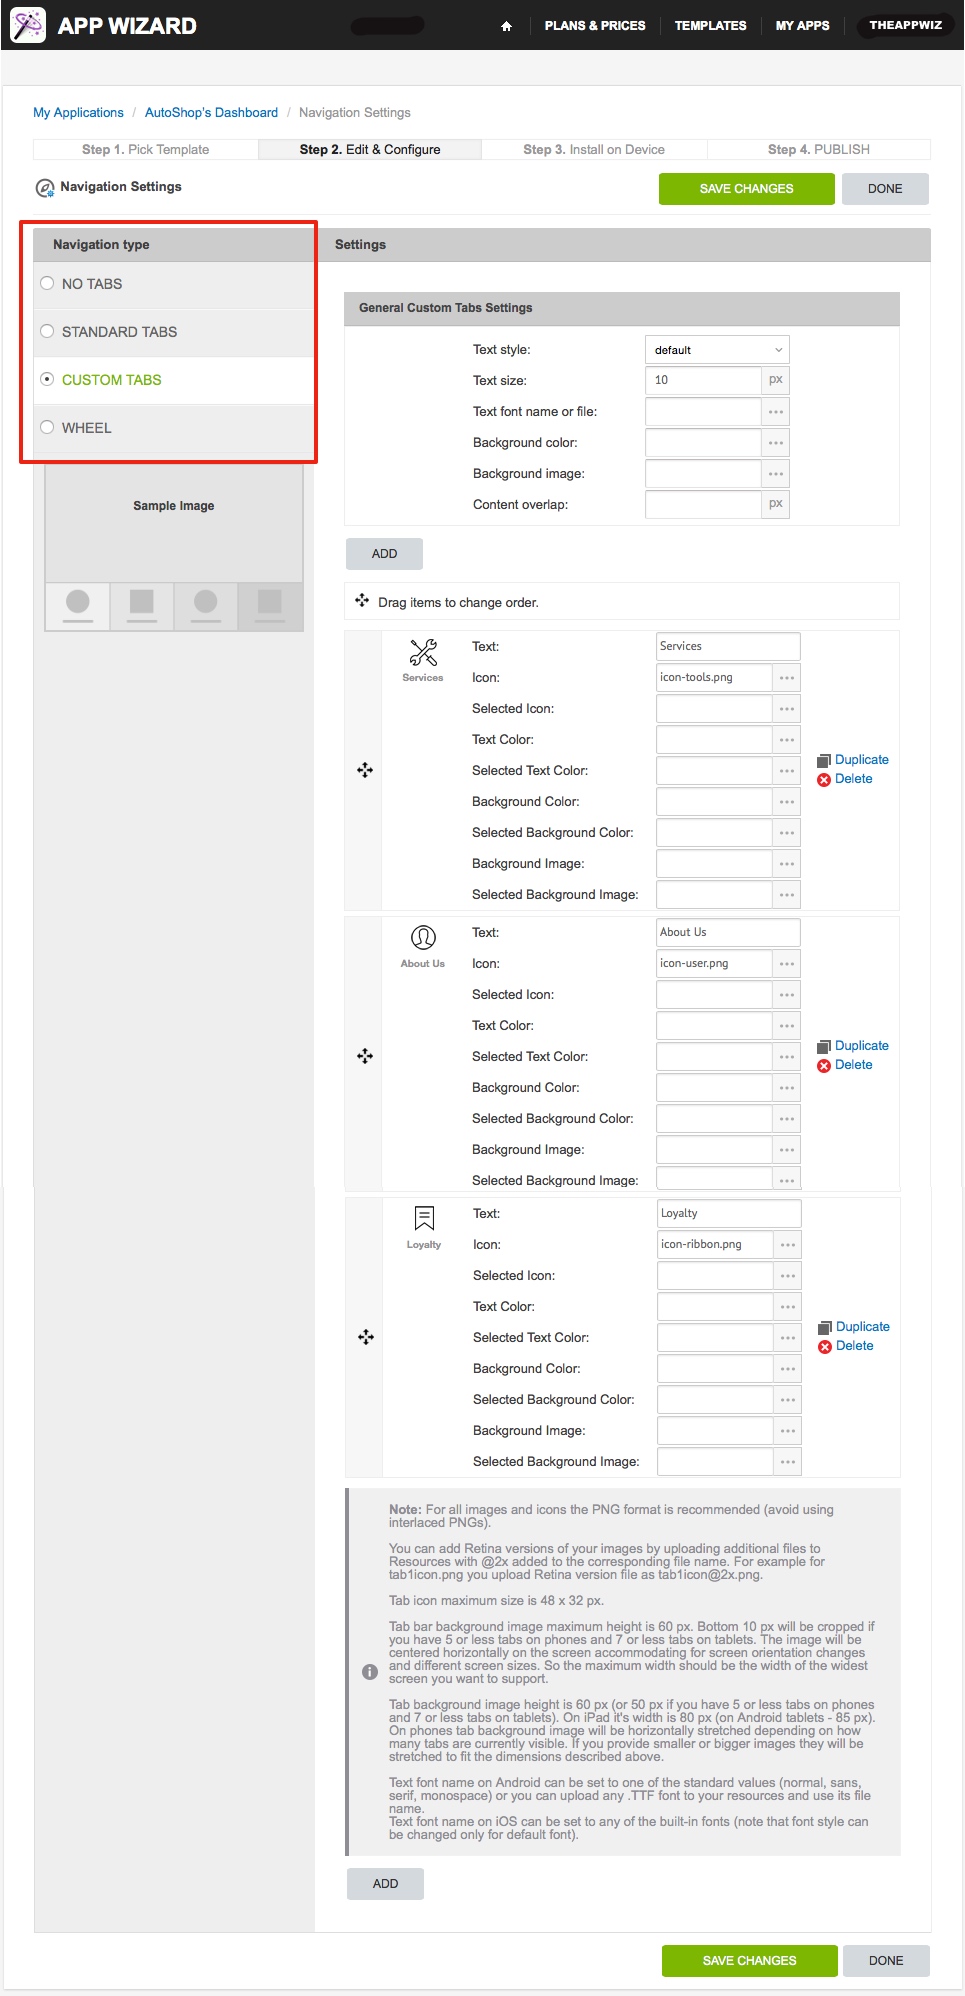
| The Custom Tabs option allows for complete customisation of the tab bar, including (default) background colour and 'Selected' background colour (i.e. the colour of the tab when the tab is tapped
/ selected by the App user). The full extent of custom tab design options are shown in the image above.
These options include using different 'Selected' tab icon images, using an image as the background (instead of a colour), using 'Selected' tab background images, changing the text colour and the 'Selected' text colour.
These design features provide a wide range of tab editing options, so you can create a unique tab configuration specific to your App, to really stand out from the crowd. Further information about editing the 'Navigation Settings' is included in the relevant Dashboard Tutorial, see Navigation Settings.
Once you've finished editing the 'Navigation Settings' for the new target platform, click 'SAVE CHANGES', then click 'DONE'. You've now converted your App from one target platform to the other and are ready to publish. Make sure you check the desired functionality of your App first (including the tabs / navigation settings) using the appropriate App Wizard Previewer for the selected device type (Apple or Android). |
