Edit Calendar Events
The following tutorial shows you how to add and edit Calendar Events in your App.
Step 1 |

|
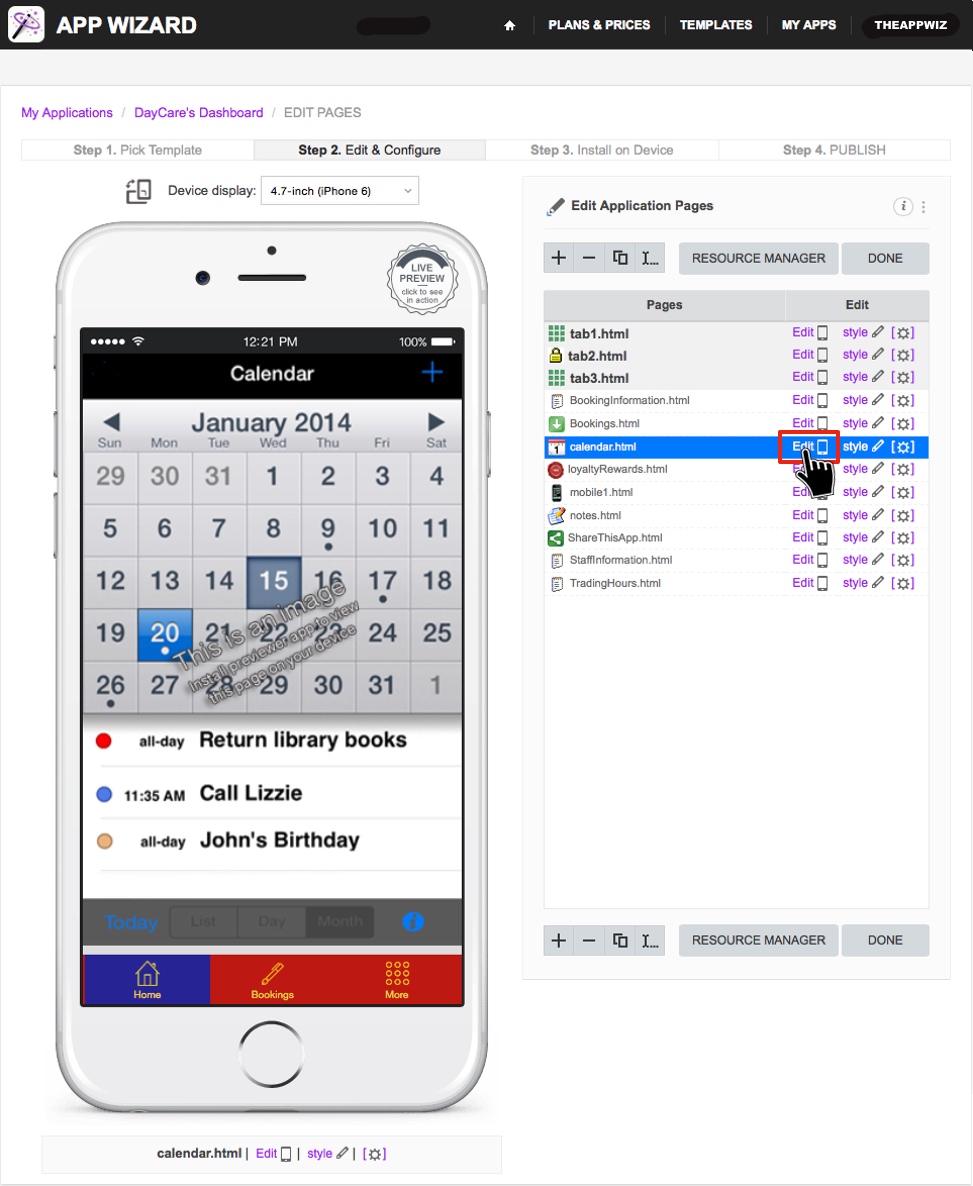
Navigate to the particular page you wish to edit (e.g. My Applications / App Name's Dashboard / EDIT PAGES / calendar.html shown in the 'Navigation Path' at the top left of 'Step 2' below). For instructions
on how to navigate to the individual page edit level, go to How to Start Editing Your App.
Select the Calendar Page from the list and click 'Edit', as shown above. |
Step 2 |

|
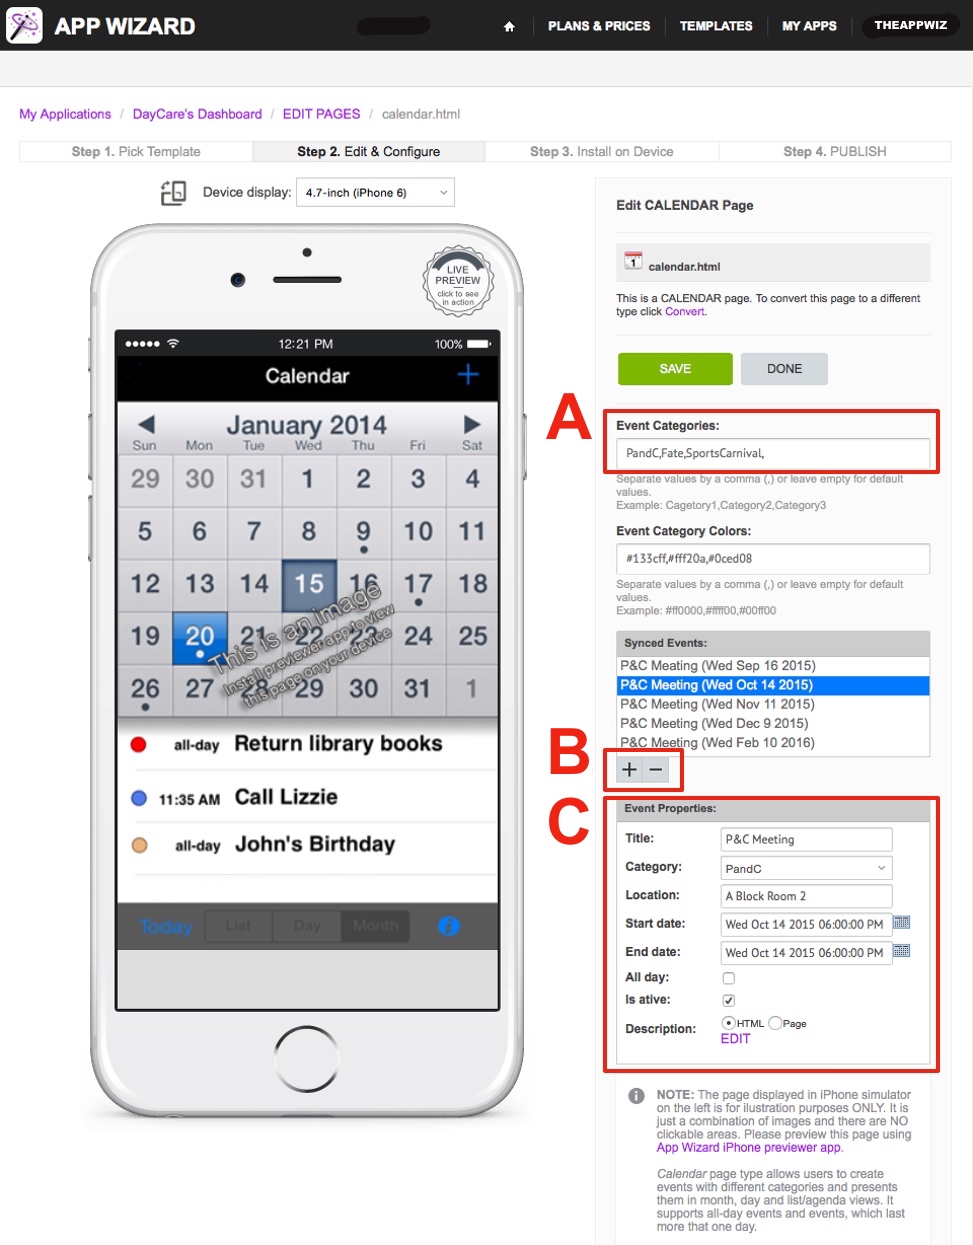
There are three main steps to setup an 'Event' in the App's calendar page.
Step A: Enter 'Event Categories' with a comma between each event (no spaces). You can also associate a preferred 'Event Category Color' by entering a hexidecimal color code for the corresponding 'Event Category' in the 'Event Category Colors' field (e.g. #133cff). Separate color codes by a comma (no spaces). Step B: Click the (+) symbol (as shown above) to add an event. In this example we've selected the the event titled 'P&C Meeting (Wed Oct 14 2015)'. Step C: Once an event is added to the 'Synced Events' list (per Step B above), the 'Event Properties' box will display the editing options for the selected event. The Title, Category, Location, Start Date/Time, End Date/Time can all be edited as required. Note that if the 'All Day' check box is selected, only the day is able to be entered (not times). Note: The 'Is Active' check box must be ticked for the selected event to be listed on your App's calendar. Note: The description of the event can be linked to a separate page in your App by selecting 'Page' at the bottom of the 'Event Properties' box. Alternatively, click 'EDIT' (below the 'HTML' option next to the 'Description' field, as shown in Step 3 below) to add the description information as required. See Step 3 below for further information about this option. |
Step 3 |

|
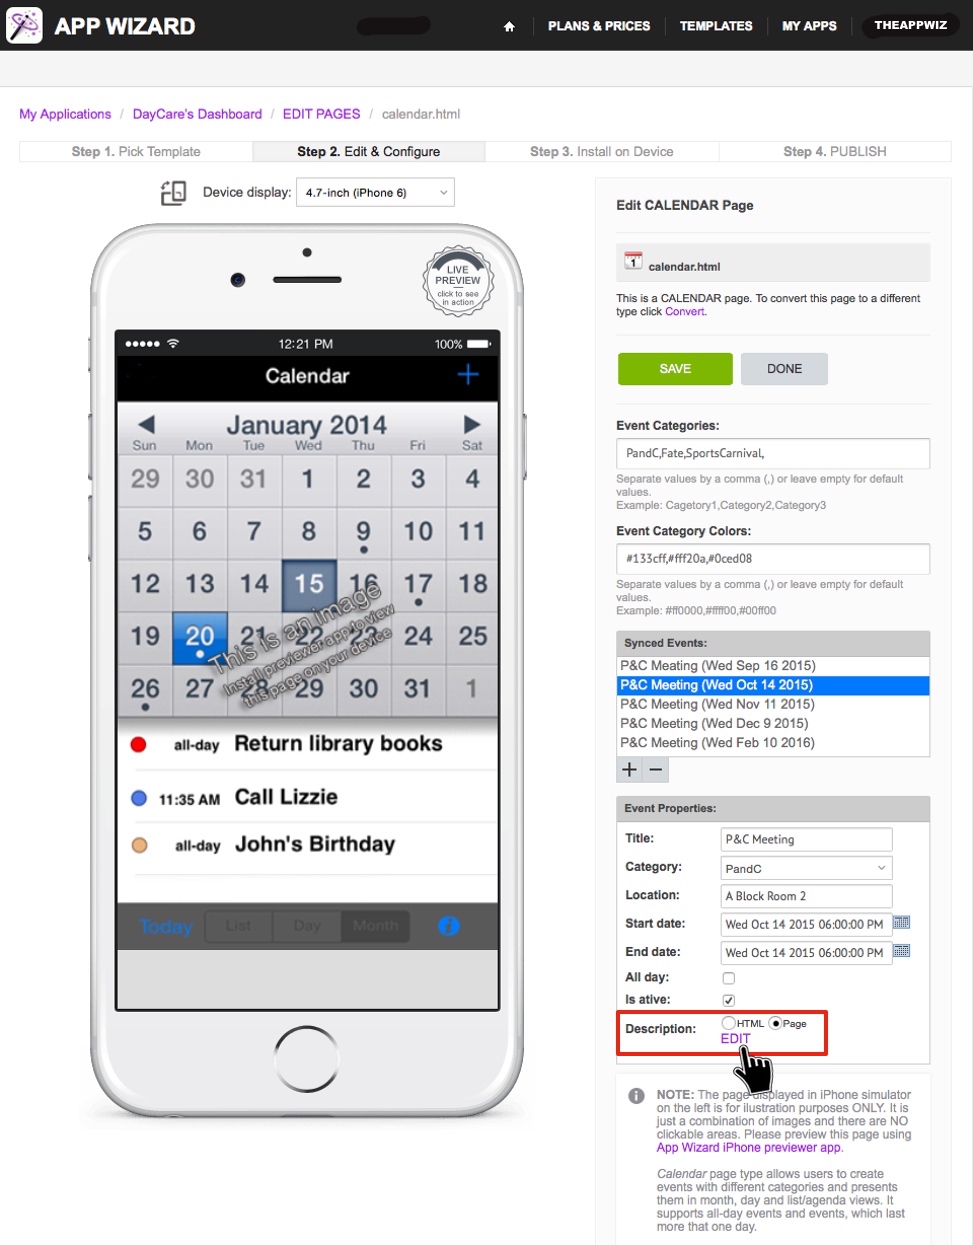
The App Wizard Calendar Page provides two options to provide a description for each Event. The first option is the 'Page Link' description. This option lets you link another existing page in your App (containing
information about the Event) to each Event.
To link a page to an Event, select 'Page' from the 'Event Properties box', then click 'EDIT' (as shown above). A 'Page List' window will open. Select the page that you wish to link to the Event, then click 'SAVE'. The second option is the 'HTML' description. This option is described in Step 4 below. Note: The events entered into the Calendar in your App can be checked by using the App Wizard Previewer on your target device (e.g. iPhone or Android handset). Refer to How to Download the App Wizard Previewer and How to Preview an App on Your Device, for further information on how to download and use the App Wizard Previewer App. |
Step 4 |

|
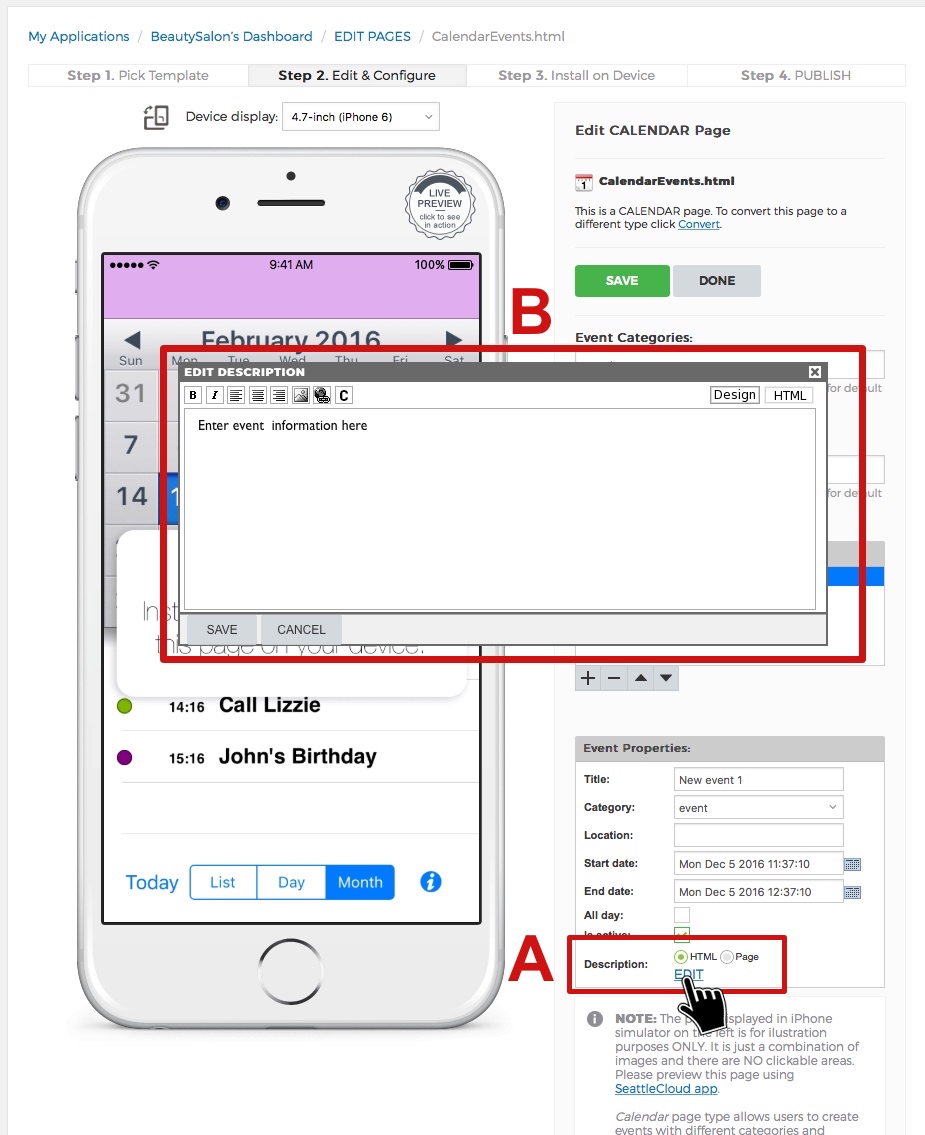
Alternatively, the App Wizard Calendar Page lets you link a separate HTML 'Event Description' which contains information about each Event. This description type is edited by selecting 'HTML' in the 'Event
Properties' box and then clicking 'EDIT' (as shown in (A) above). The 'Edit Description' pop-up window will appear (as shown in (B) above), where the description can be edited as required.
The 'Edit Description' pop-up window can be edited in either 'Design' mode or 'HTML' mode (by selecting either option at the top right of the pop-up window. Images, links and information about the Event can be inserted in the HTML 'Event Description' pop-up window as required. After editing the description, click 'SAVE' to close the window.
Note: The events entered into the Calendar in your App can be checked by using the App Wizard Previewer on your target device (e.g. iPhone or Android handset). Refer to How to Download the App Wizard Previewer and How to Preview an App on Your Device, for further information on how to download and use the App Wizard Previewer App. |
