Edit Pages

Editing pages is a fundamental requirement to customise your App. This tutorial describes the basic page editing functions.
|
Select your App from the 'My Applications' list. In the 'Application Dashboard', click 'EDIT PAGES' as shown above.
|
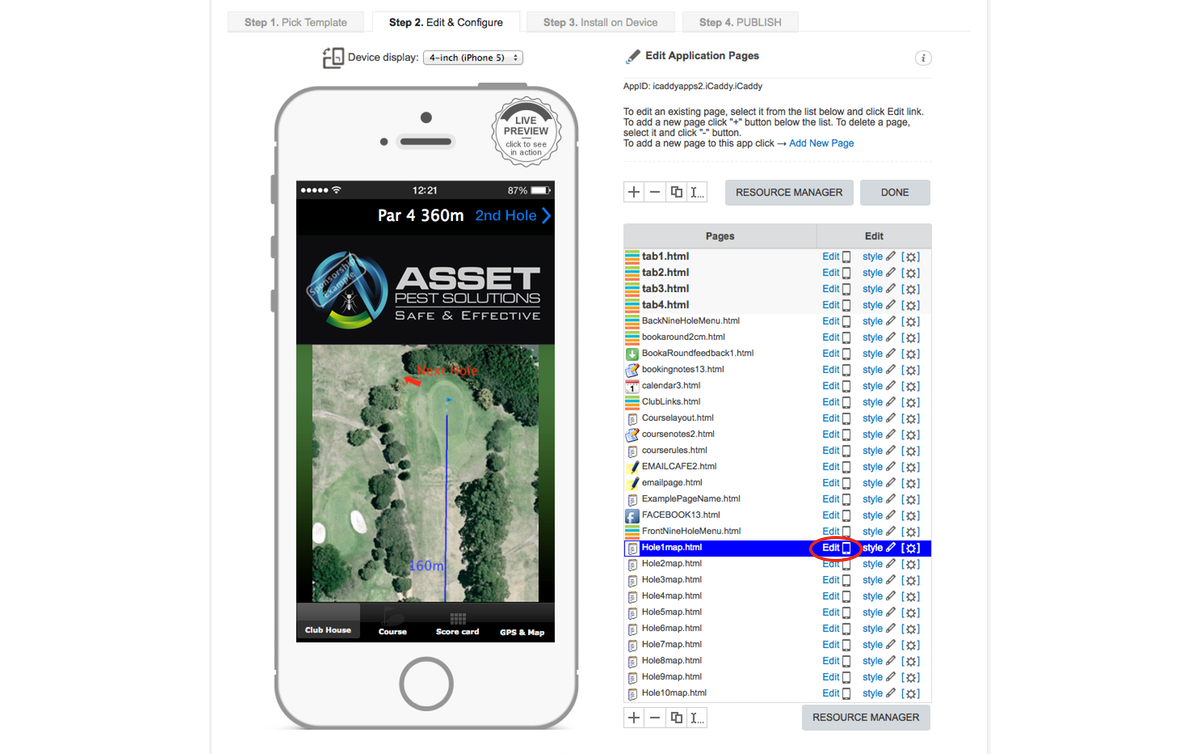
On the 'Edit Application Pages' screen, select the particular page you wish to edit. The selected page will be highlighted in blue as shown above.
Each page has three editing options - 'Edit', 'Style' and 'Page Settings' (Page Settings are accessed via the cog icon - see above). |
|
The first editing option is the 'Edit' function. This option allows you to edit the content on the selected page. Click 'Edit'.
|
|
Option 1 - 'Edit' (continued)
|
After clicking 'Edit' in the previous step, the selected page will open. From here, you can edit the page's content as required.
For more information on how to edit the content on a selected page, refer to Build Procedures Tutorial 1.3 - How to Start Editing Your App. |
|
The second editing option is the 'Style' function. This option allows you to edit the App's style properties.
|
|
Option 2 - 'Style' (continued)
|
After clicking 'Style' in the previous step, the 'Design Page Style' screen will open - see above. From here, you can change 'background image' or 'background color' for the selected page.
Note: The other properties listed (e.g. 'Background Repeat' etc.) are provided for advanced users. These properties do not need normally to be edited when building an App from
an existing App Wizard template.
For more information on how to edit the background, go to Build Procedures Tutorial 1.4 - How to Change the Background.
|
|
Option 3 - 'Page Settings'
|
The third editing option is the 'Page Settings' function. This option allows you to edit a variety of settings for the selected page.
Click the 'cog' icon indicated above to access these settings. |
|
Option 3 - 'Page Settings' (continued)
|
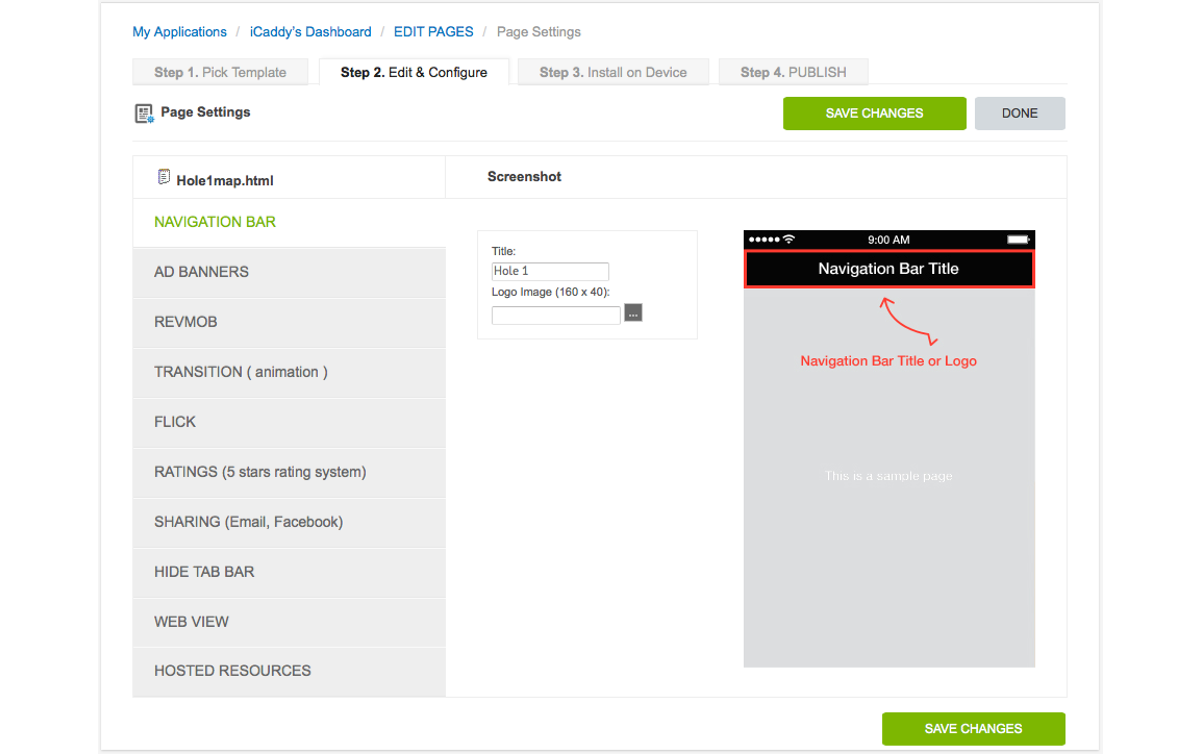
After clicking on the 'cog' icon in the previous step, the 'Page Settings' window will open - see above. From here, you can edit various page settings. The setting categories are listed down the left-hand side
of the window (e.g. NAVIGATION BAR, AD BANNERS etc.). Setting categories may contain multiple properties to edit.
Note: The 'Page Settings' window (shown above) contains a summarised list of all the settings for the selected page. If you select 'Page Settings' directly from the App's 'Dashboard'
(as shown in the first screen-shot at the start of this tutorial), all the settings for all pages in the App are displayed. You can edit each page's settings via either method.
For further information on editing 'Page Settings' and a description of each setting, refer to Dashboard Help Tutorial 2.3 - Page Settings.
|
| 


