How to Add a New Image to a Page in Your App

Step 1 |
|
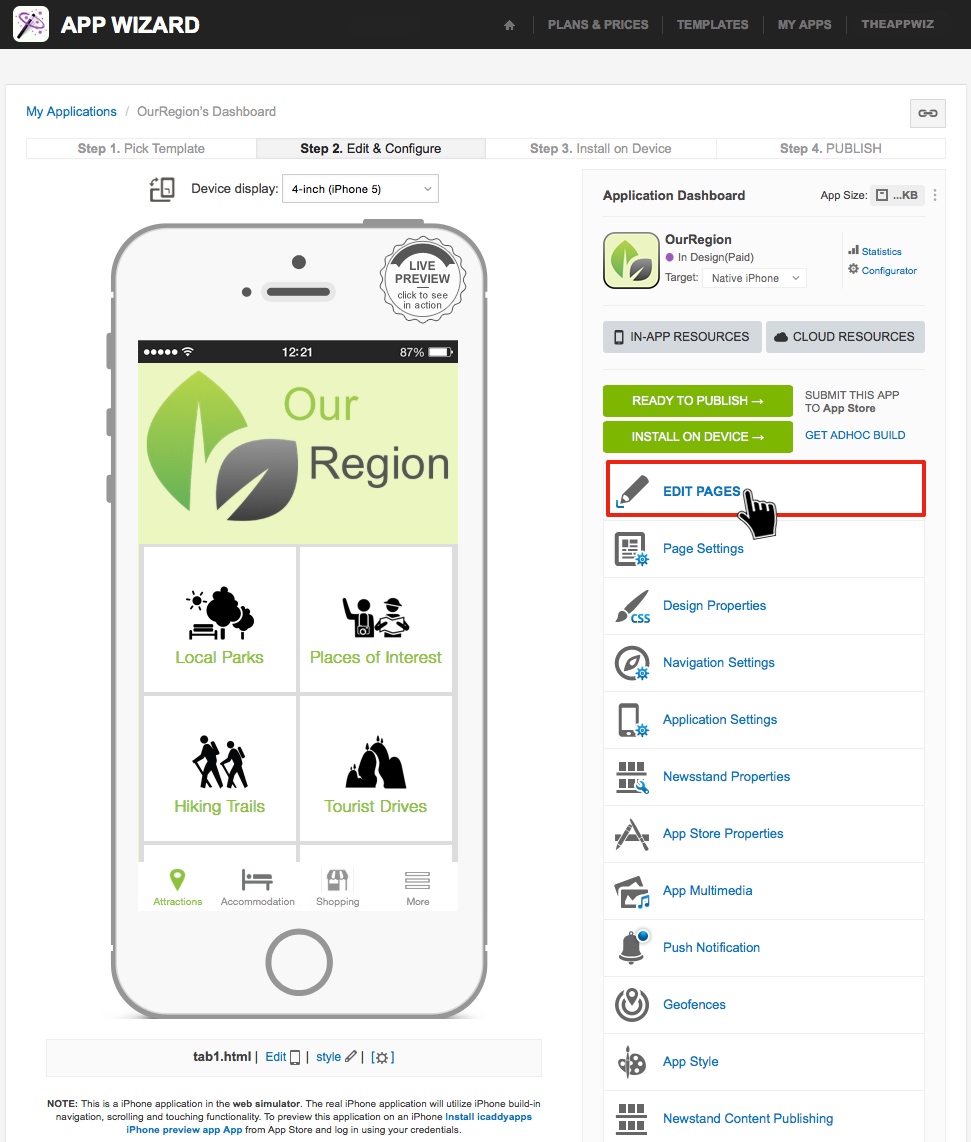
From the App's 'Dashboard', select 'EDIT PAGES'.
|
Step 2 |
|
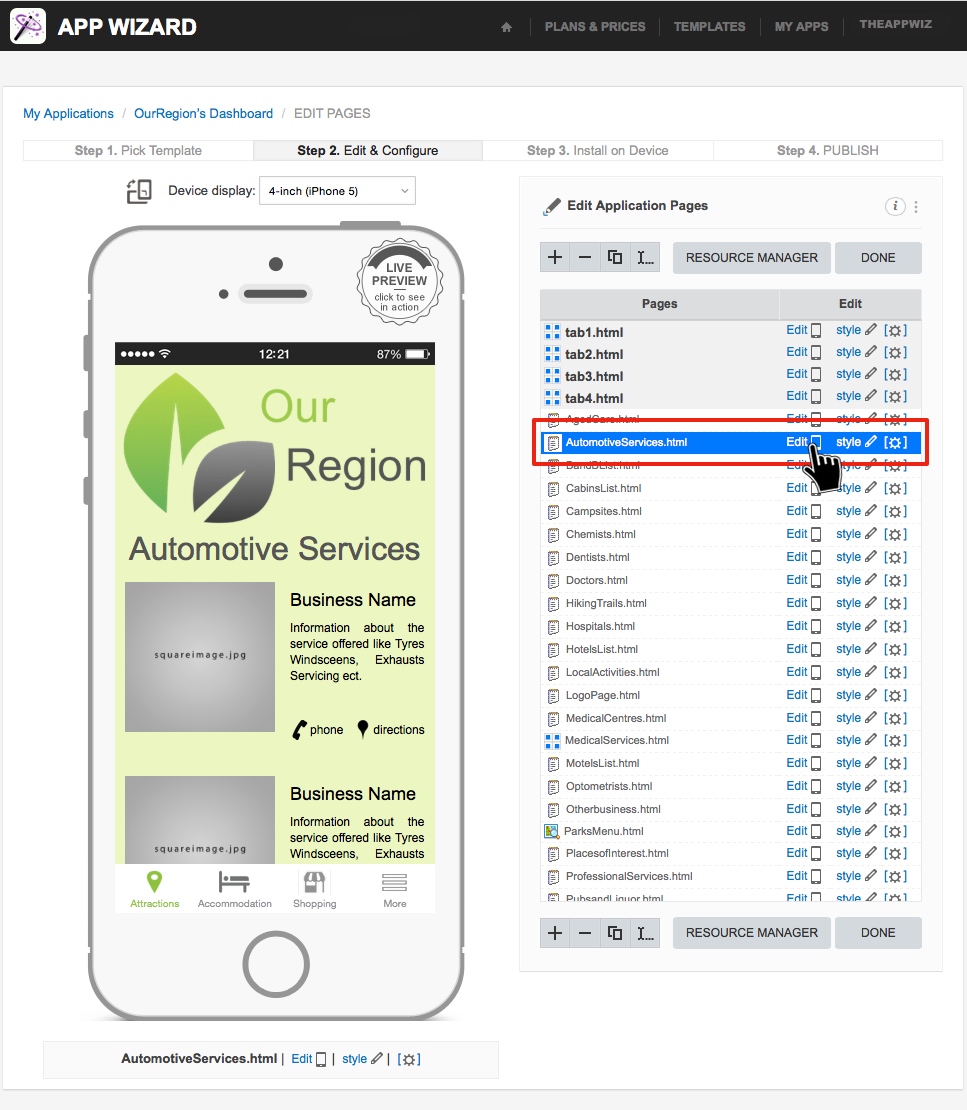
From 'EDIT PAGES', select the page you wish to edit from the page list. Click 'Edit' as shown above. This will open the specific page for editing.
|
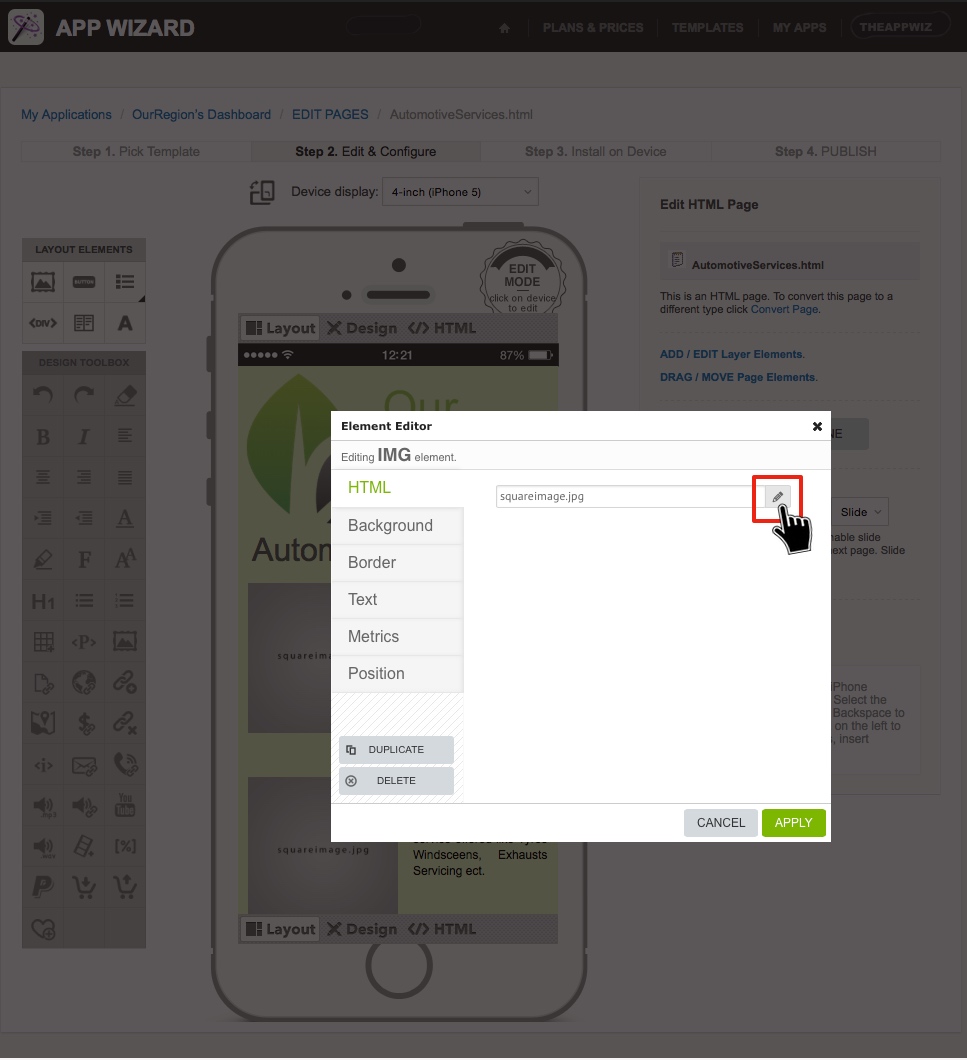
Step 3 |
|
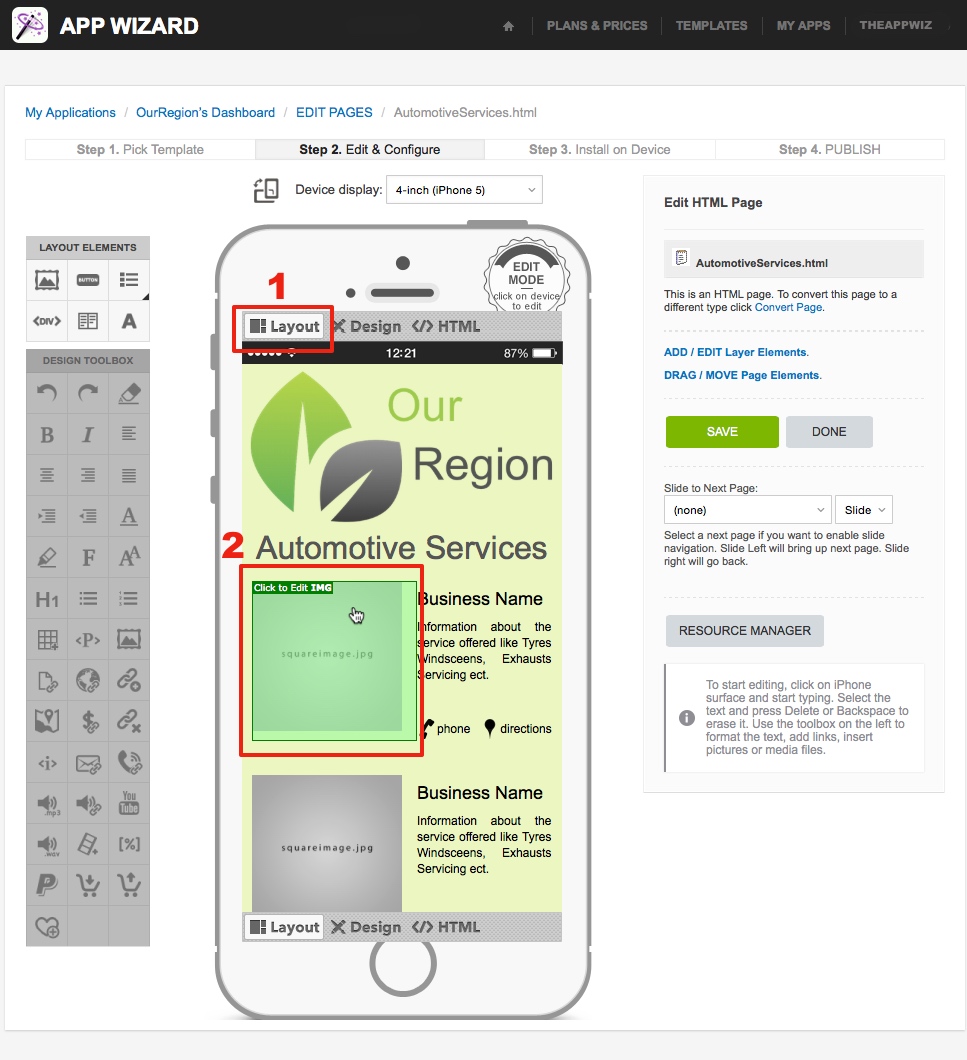
1. On the chosen page, select 'Layout' (located at the top left of the 'Handset Display'). 2. Hover your mouse over the image on the 'Handset Display' that you wish to change. The image (Element) will then be highlighted (and 'Click to Edit IMG' will appear at the top left of the image, as shown above). Click on the highlighted image (element) to open to the 'Element Editor' for that image. In some cases, you may need to click the 'element' twice. The 'Element Editor' window will appear. Note: There are different 'Element Editor' windows for different 'element' types. For example 'Edit A element', or 'Edit img element' etc. The 'Element Editor' which opens will depend on the type of 'element' selected. See below. Important: It is important to ensure the correct 'Element Editor' opens for the selected 'element' type. In some cases, the same content (i.e. elements) can be edited from different 'Element Editors', however once the 'Element Editor' window opens, check that the correct element (e.g. image) remains selected on the 'Handset Display'. The 'Element Editor' can be relocated if it obscures the 'Handset Display'. If the wrong element is selected on the 'Handset Display', click 'CANCEL' on the 'Element Editor' to return to the previous page, and reselect the correct element before proceeding. Alternatively, check if the element you are trying to edit is indicated in any of the fields listed in the 'Element Editor' (e.g. in the 'Image' field) and then edit the selected element as required. See the Element Editor tutorial for further information about the Element Editors. Please contact the App Wizard help team if you experience any problems with selecting or editing elements. |
Step 4 |
|
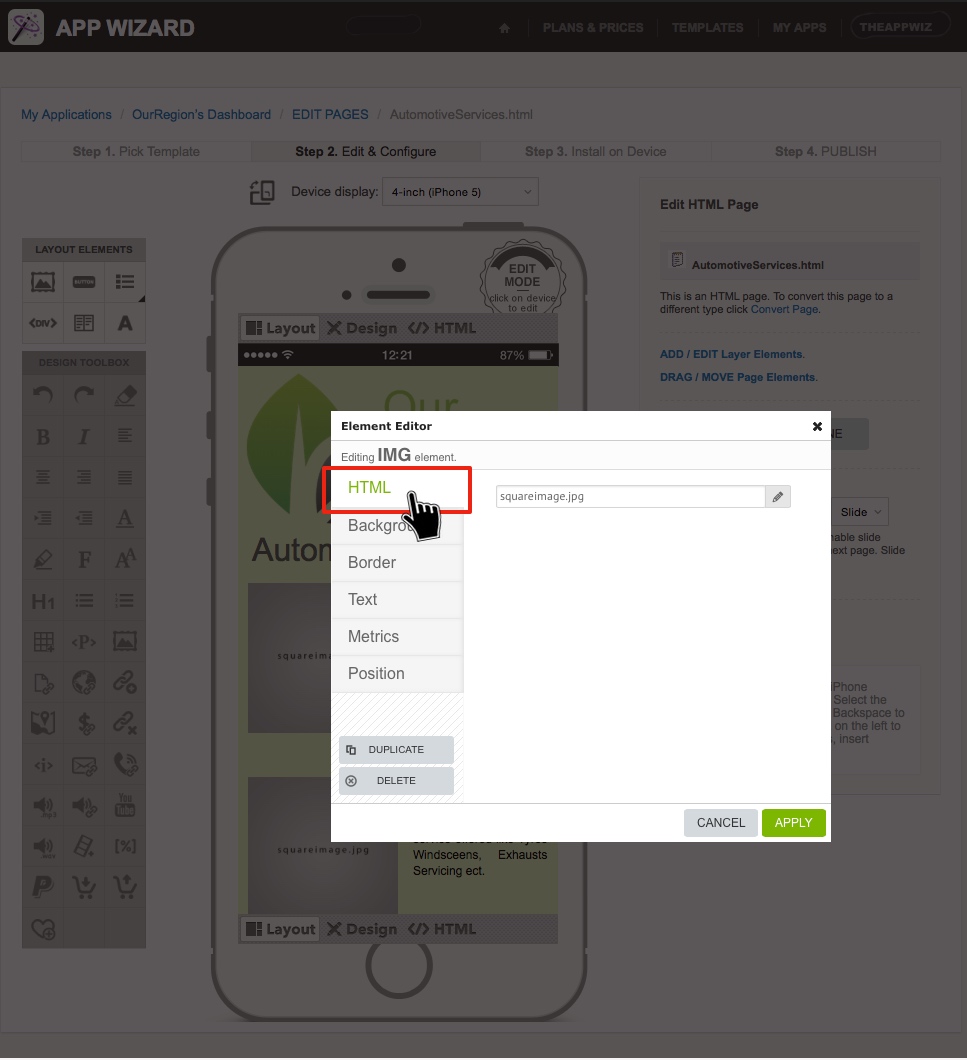
In the 'Element Editor', select 'HTML'.
|
Step 5 |
|
Click on the Pencil symbol (shown above). The 'RESOURCE MANAGER' window will appear (as shown in the next step).
|
Step 6 |
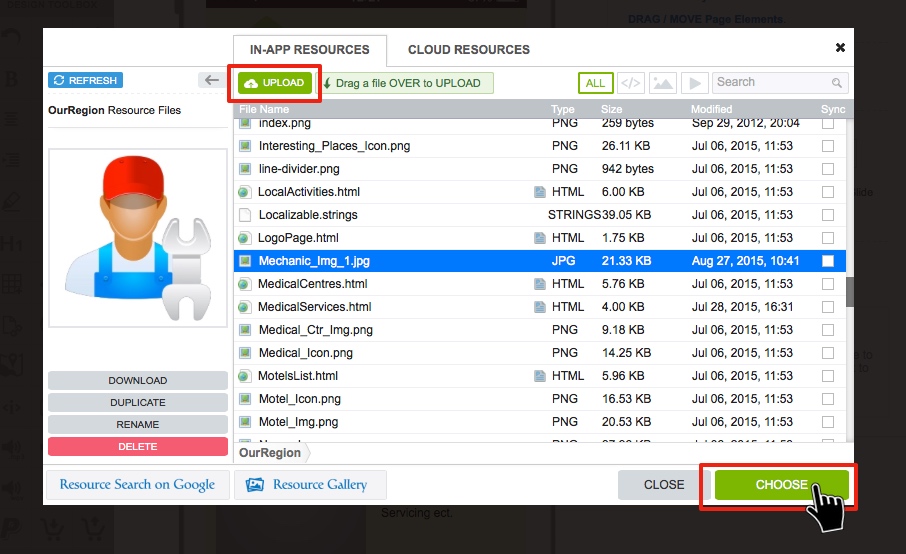
|
After clicking the pencil symbol described in the previous step, the 'RESOURCE MANAGER' window will appear, as shown above. Make sure the 'IN APP RESOURCES' tab is selected at the top of the window. Note that 'CLOUD RESOURCES' are not required to be used unless you have very large files (which exceed the 'In App Resources' cache limit) included in your App. If you have not already uploaded the required image into the 'Resource Files' for your App, select 'UPLOAD' (as highlighted above). For more information on how to upload a file, go to How to Add a File to 'In App Resources'. If you have already uploaded the image into the App's 'Resource Files', select the corresponding file from the list, then click 'CHOOSE'. The 'RESOURCE MANAGER' will close and you will return to the 'Element Editor'. |
Step 7 |
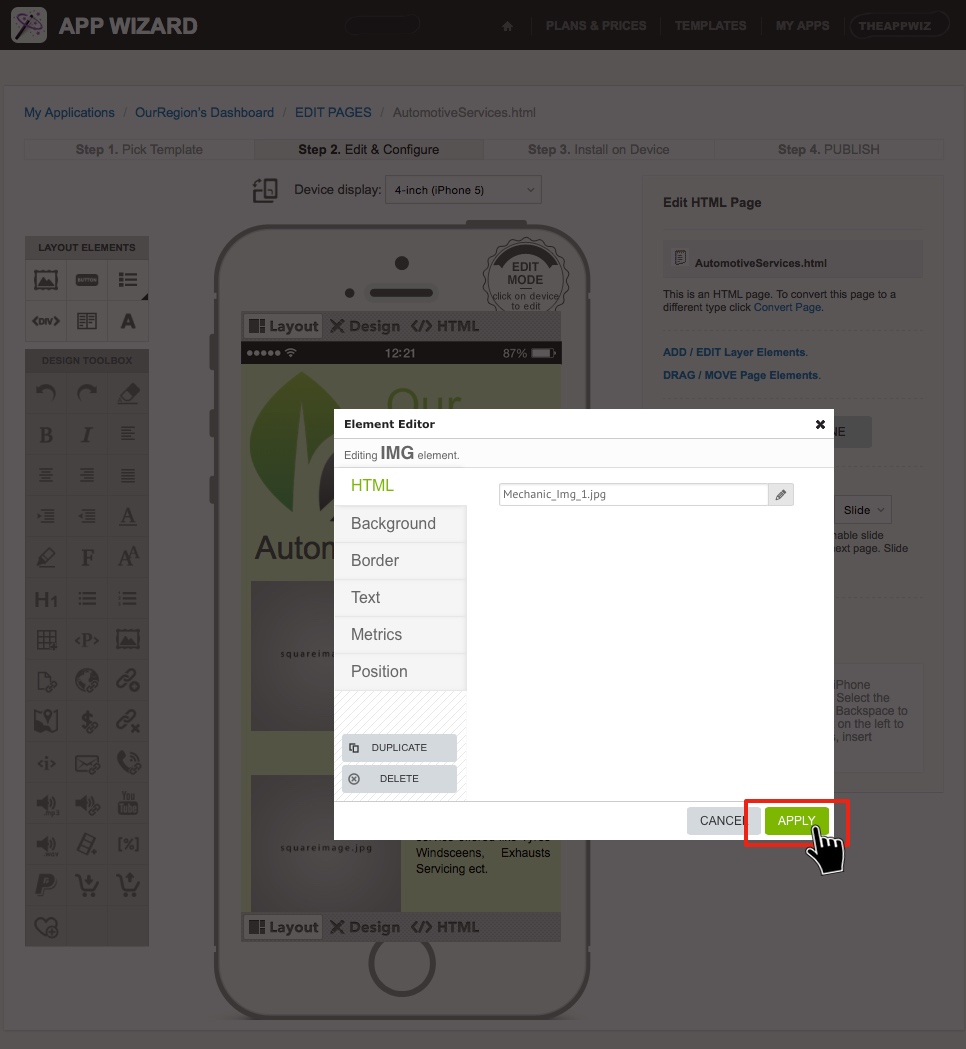
|
The previously selected file should appear in the HTML field of the 'Element Editor' (e.g. Mechanic_Img_1.jpg as shown above). Click 'APPLY'. This will update (associate) the image with the corresponding 'Element' (selected in Step 3 above). The 'Element Editor' will close and you will return to the 'EDIT PAGES' screen. |
Step 8 |
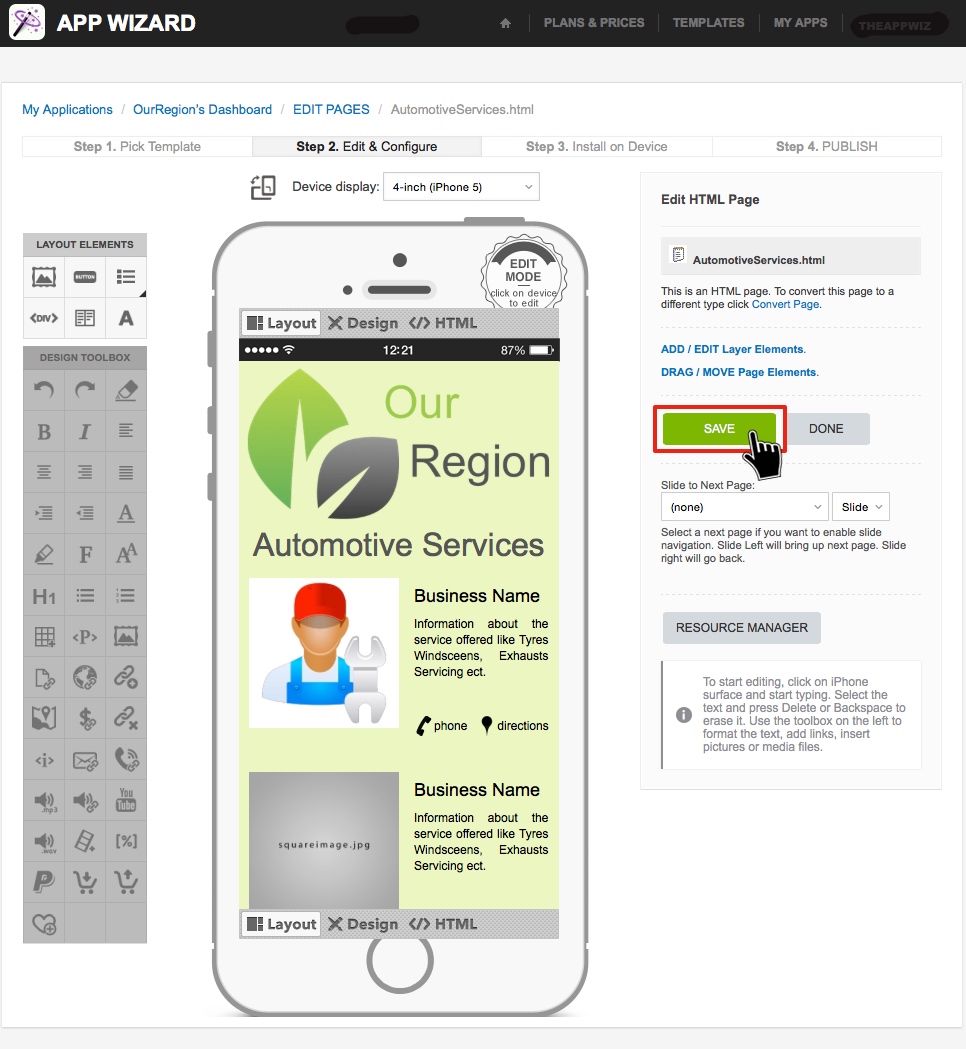
|
Click 'SAVE'. The image should now appear on the 'Handset Display'.
Note: You will also be able to view the changes immediately on your device using the App Wizard Previewer. Refer to How to Download the App Wizard Previewer and How to Preview an App on Your Device, for further information on how to download and use the App Wizard Previewer App. |