How to Edit a Loyalty Page
Customer loyalty programs are a proven marketing strategy which can benefit a wide range of business types.
Using the App Wizard Loyalty page type, businesses can offer discounts or rewards to attract repeat
business. The criteria and reward can be customised to suit, based on customer loyalty and purchasing patterns (e.g. get 10% off your next visit, get your 10th coffee free, or get a free upgrade on your 3rd purchase)
- whatever works for your business!
Select Loyalty Page |

|
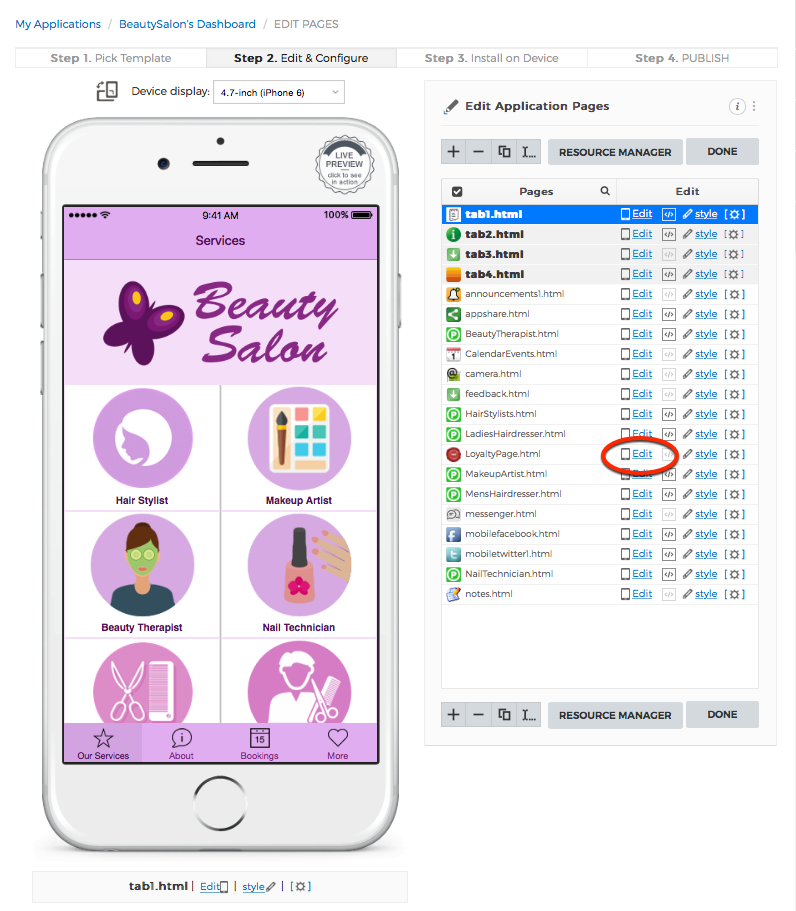
From the App's Dashboard, select the Loyalty page in your App and click 'Edit' (as shown above).
Most App Wizard templates include a Loyalty page by default, however if the template you chose does not include a Loyalty page, simply add the Loyalty page type to your App. For more information on adding a new page to your App, see How to Add a New Page. |
Loyalty Page Settings - Target Email Address & Message |

|
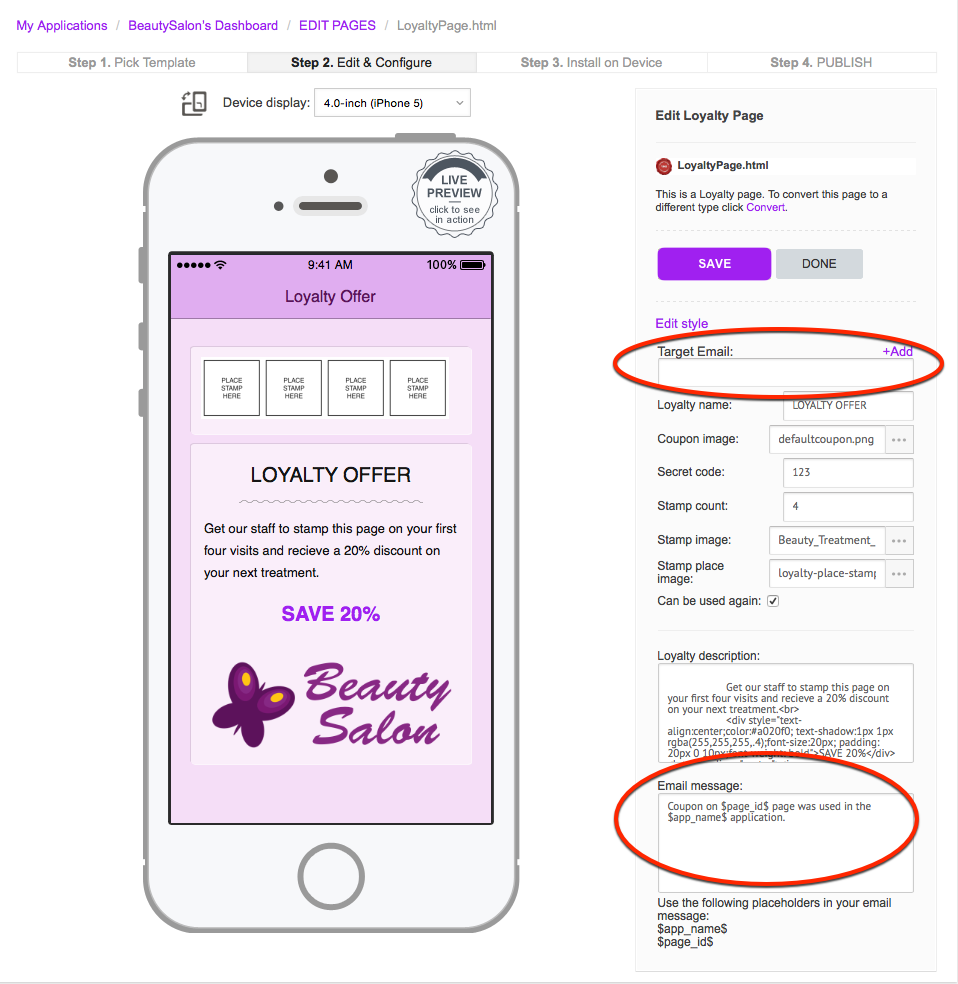
Edit the Loyalty Page style settings on the right hand side of the page to customise your Loyalty page as required. Each setting is described further below.
Target Email. Enter an email address in the 'Target Email' field to receive notifications when the Reward Coupon is used. The Reward Coupon is provided on the customer's device after all Stamps have been obtained (validated). Multiple email addresses can be entered by selecting '+Add' next to the 'Email Address' field. Email message. The text of the email message (sent to the Target email address) can be edited in the 'Email Message' field (if required). The '$page_id$' code in the 'Email Message' field refers to the internal App Wizard reference for the Loyalty Page in the App - do not edit this code. The '$app_name$' code refers to the internal reference for the name of your App - do not edit this code. Note: Setting up an email address and email message for Loyalty Page notifications is optional. |
Loyalty Page Settings |

|
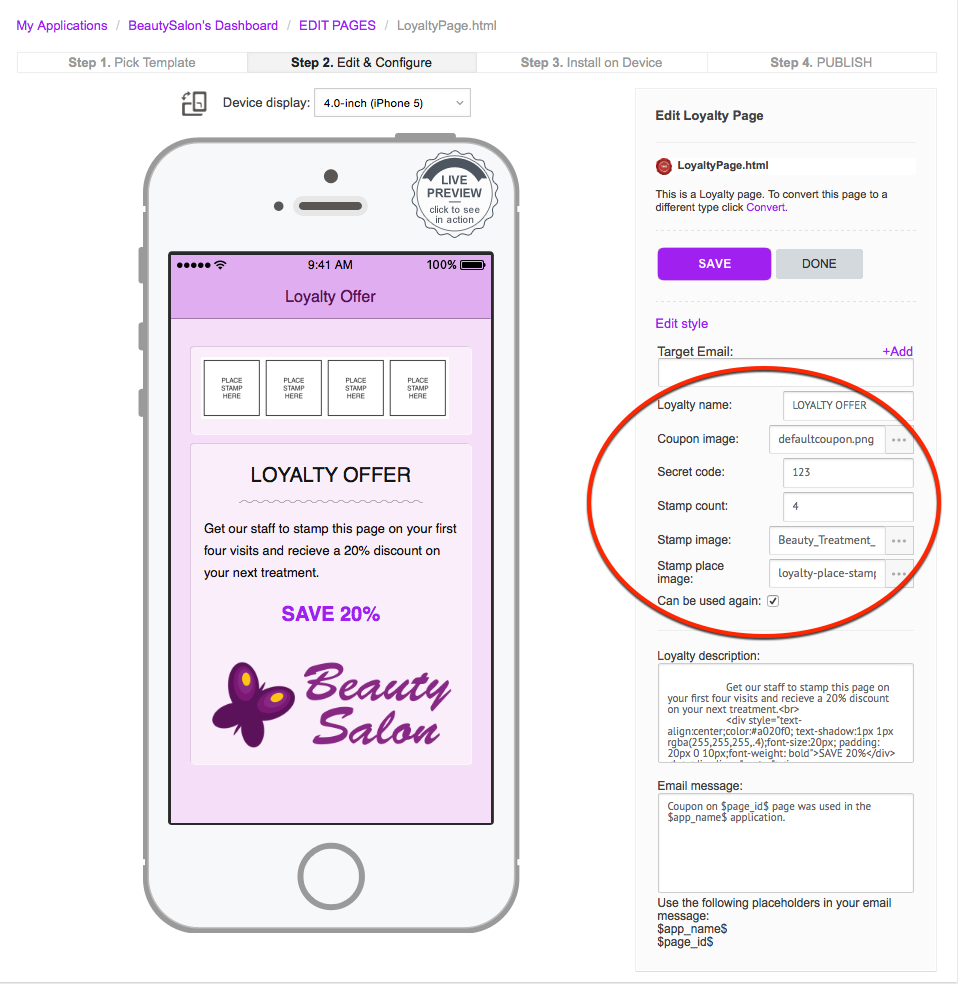
Loyalty name. Enter the description of your offer (e.g. LOYALTY OFFER).
Coupon image. The coupon image is displayed on the App user's handset after all the stamps have been validated. The App user (customer) presents the Reward Coupon to a staff member to obtain
the reward. Select the preferred Coupon image from the App's Resources by clicking on the (...) cell on the right hand side of the 'Coupon image' field. For further information on uploading images to the
App's Resources, see How to Add a File to In-App Resources.
Secret code. Enter a specific code which will be used by your staff to validate a stamp. After the customer makes the purchase, the customer provides their handset to a staff member for
validation (stamping). The staff member selects 'Get Stamp' on the Loyalty Page and then enters the specific code. The selected 'stamp image' is then indicated in place of the blank (unvalidated) stamp -
see 'Stamp image' and 'Stamp place image' below.
Stamp Count. Enter the desired number of stamps associated with your offer. The example above shows an offer using 4 stamps. You can enter as many stamps as required. Note that the layout
of the stamps on the 'handset display' does not necessarily reflect how the stamps are layed-out on the Loyalty Page in the App. To verify the layout, check the Loyalty Page using the App Wizard Previewer
on your device. For more information on using the App Wizard Previewer, refer to How to Preview an App on Your Device.
Stamp Image. Select the image to be used when a stamp is validated. This image will replace the 'Stamp place image' (described below) when the stamp is validated. Select the preferred image
from the App's Resources by clicking on the (...) cell on the right hand side of the 'Stamp image' field. For further information on uploading images to the App's Resources, see How to Add a File to In-App Resources.
Stamp place image. Select the image to be used to represent unvalidated stamps. The example above shows a bordered image which indicates 'Place Stamp Here'. This image is replaced by the
chosen 'Stamp Image' once the stamp is validated.
Can be used again. Ticking this box allows the App user to re-use the Loyalty Page after all stamps have been validated and the reward provided to the customer. After the reward coupon is
used, all stamp validations are reset to zero.
|
Loyalty Description |

|
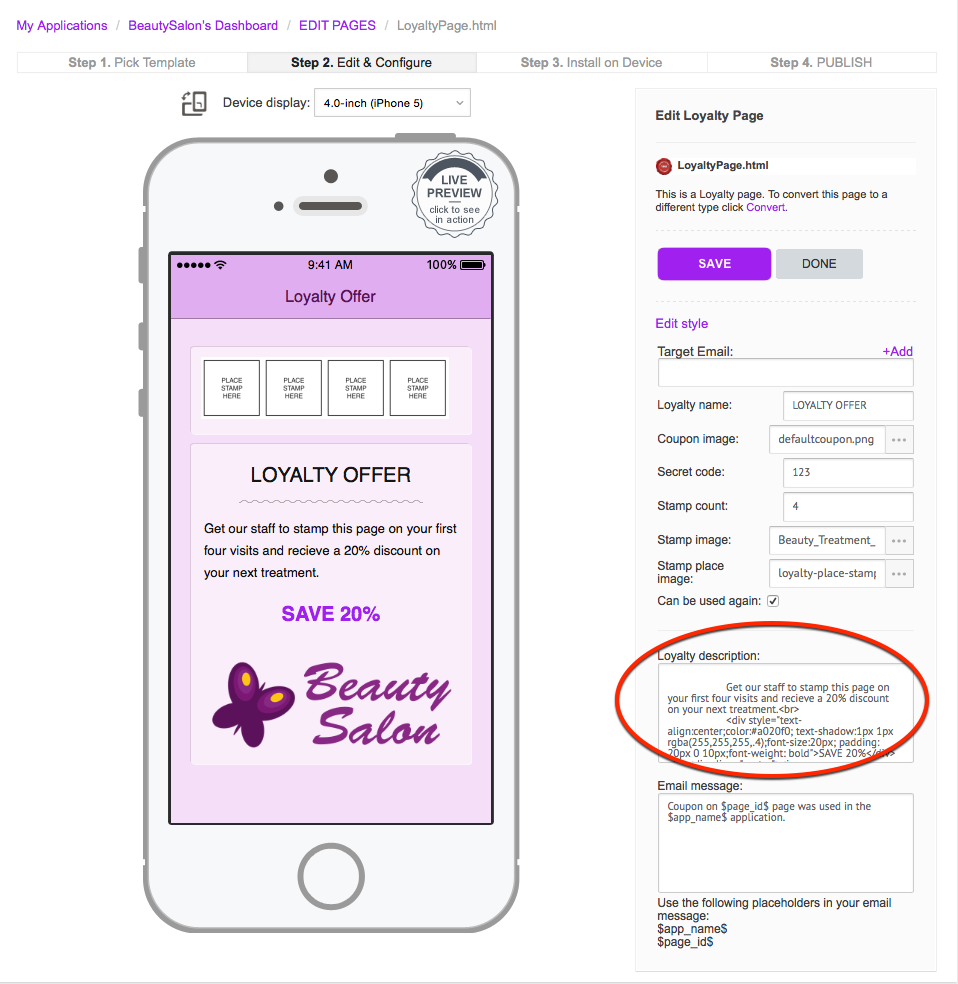
Loyalty description. Enter the description of the offer (e.g. Buy 9 coffees and get your 10th coffee free!). HTML code can be used to design and position the text as required.
To change the image displayed on the Loyalty Page (such as the 'Beauty Salon' logo in the example shown above), enter the filename of the preferred image (stored in the App's Resources) after the code 'img src=' (e.g. "Beauty_Salon_Logo.png"). Note that
the dimensions of the source image will need to be considered in order to fit the screen as required. HTML code can be used to configure (and/or resize) the image file as part of the 'Loyalty description'.
Including an image is optional - simply delete the relevant HTML code in the 'Loyalty description' field if preferred.
Please contact the App Wizard Build Team for assistance with the 'Loyalty description' if required. We're here to help!
|
