How to Create a Binary File (.ipa) for an iOS App
The following tutorial shows you how to generate an iOS binary file (.ipa), so that you can publish your App at the Apple 'App Store'. Once created, the .ipa file is then able to be uploaded into 'App Store Connect' as part of the publishing process.
In 2019, Apple Inc. changed their ‘App Store Review Guidelines’ to require all entities who wish to publish an App on iOS devices (i.e. iPhone or iPads) to enrol in the ‘Apple Developer Program’ and establish their own ‘Apple Developer Account’. This is a unilateral Apple policy requirement outside App Wizard’s control. To learn more about enrolling in Apple's Developer Program, see the Apple website.Despite these changes, App Wizard provides outstanding service and support to assist our subscribers to publish their iOS Apps on the App Store and make the publishing process easy!
Note: Only 'Paid Apps' which have been added to your Subscription Plan are able to be published. For more information on adding an App to your plan, see 'How to Add an App to your Subscription Plan'.
Step 1 |
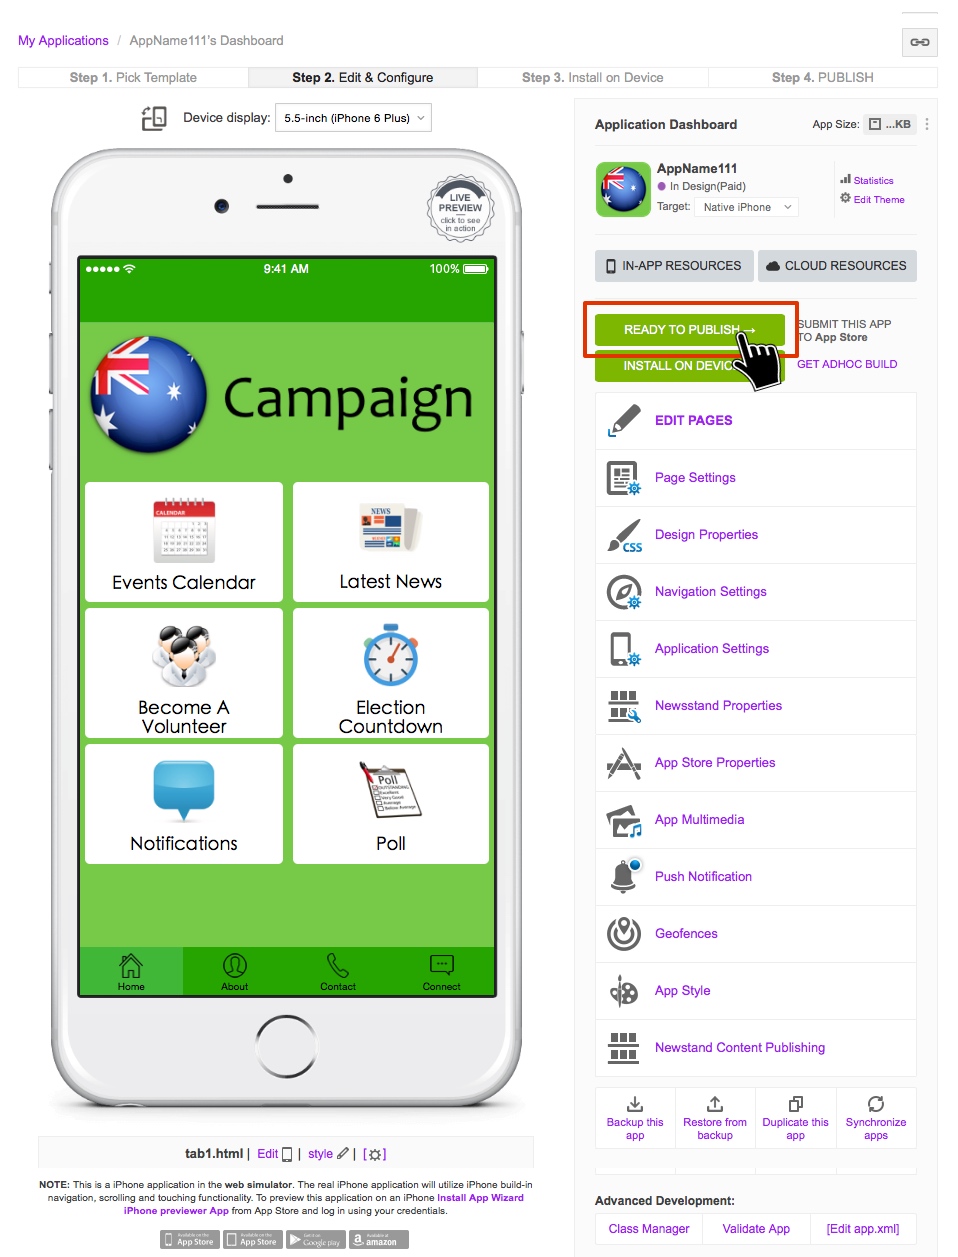
Navigate to the ‘Application Dashboard’ for the App you wish to publish. Click ‘READY TO PUBLISH’ as shown above.
|
Step 2 |
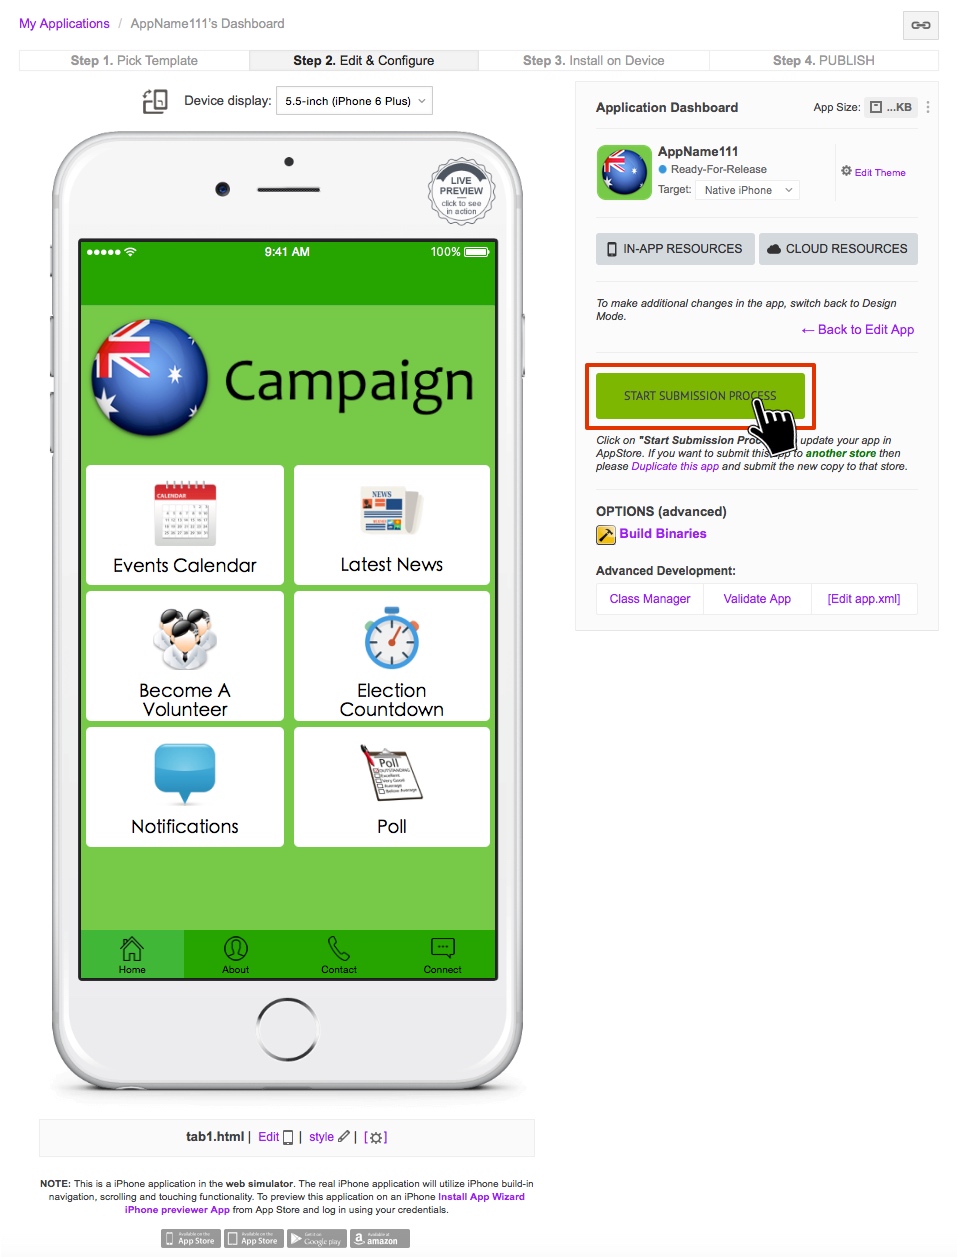
Click ‘START SUBMISSION PROCESS’.
|
Step 3 |
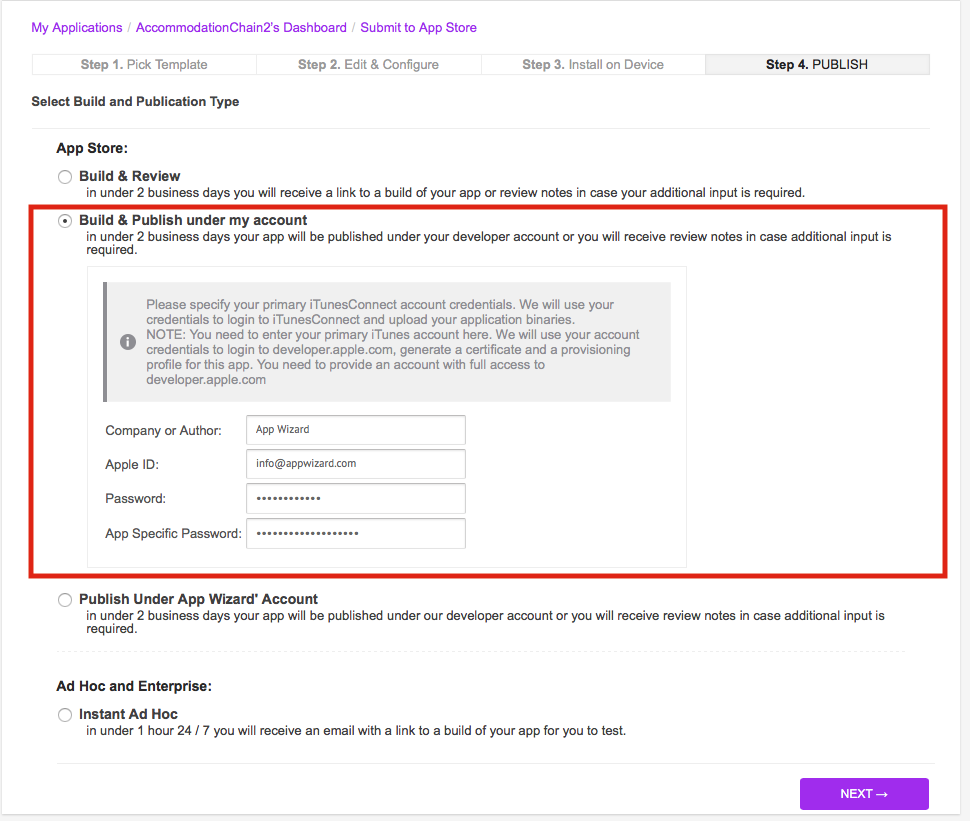
Select ‘Build and Publish under my Account’.
Note: Apple require all Apps to be published under the App owners own developer account. You must select the 'Build and Publish Under My Account' option for release on the Apple App Store. You will need to provide the relivant details shown above, all Apps must meet the copyright requirements specified. For further information regarding App publishing requirements on the App Store, go to App Store Review Guidelines, or contact App Wizard. Click ‘NEXT’. The ‘App Store Properties’ screen will appear (as shown below). |
Step 4 |
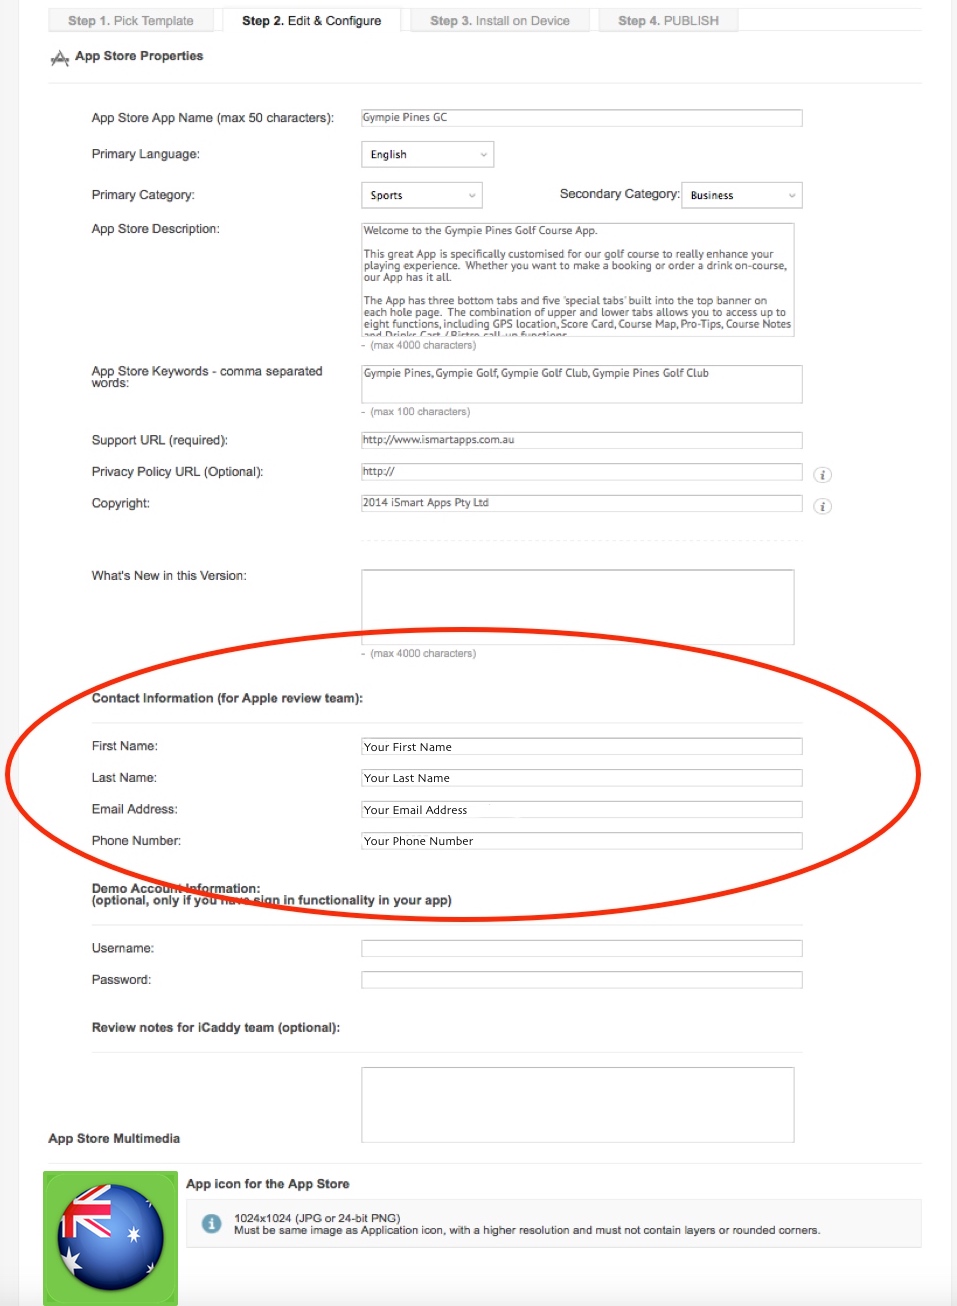
App Store Properties. The publishing process requires you to verify the content in your App, including the 'App Store Properties' (as shown above). If you have previously completed this information (as described in How to Edit 'App Store' Properties & Multimedia), most of the required information and content will be pre-polulated. You can apply final edits here if required. For further information on how to edit the ‘App Store Properties’ for your App, go to How to Edit 'App Store' Properties & Multimedia.
Contact Information (for Review team). Enter your contact details as required. If your App complies with the publishing requirements, it is unlikely you will be contacted. Review Notes. Include any ‘Review Notes’ as required (optional). For example, review notes might describe the reason for re-publishing. Demo Account Information. The ‘Demo Account Information’ properties only need to be completed if you have customised your App to include ‘Log-In’ functionality (e.g. restricted access feature). This functionality is not incorporated into the App Wizard range of templates by default, so ordinarily you can leave these fields blank. App Store Icon. Make sure the ‘App icon for the Play Store’ displays your preferred icon. For further information on editing your App’s icon, go to How to Edit 'App Store' Properties & Multimedia. Click ‘NEXT’. The ‘Apple Push Notifications Settings’ screen will appear (shown below). |
Step 5 |
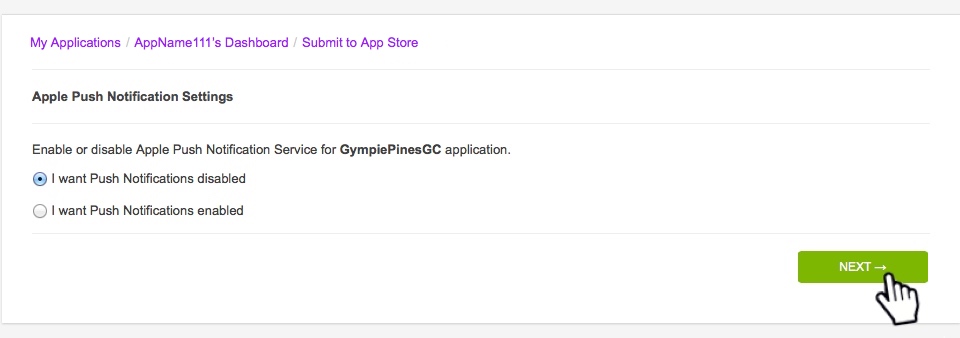
Push Notification Settings. App Wizard templates do not have Push Notifications enabled by default. Only select ‘I want Push Notifications enabled’ if you wish to incorporate 'Push Notifications' into your App. For further information on setting up Push Notifications in your App, go to Dashboard Help 2.11 Push Notifications.
Click ‘NEXT’. The ‘App Multimedia' screen will appear (shown below). |
Step 6 |
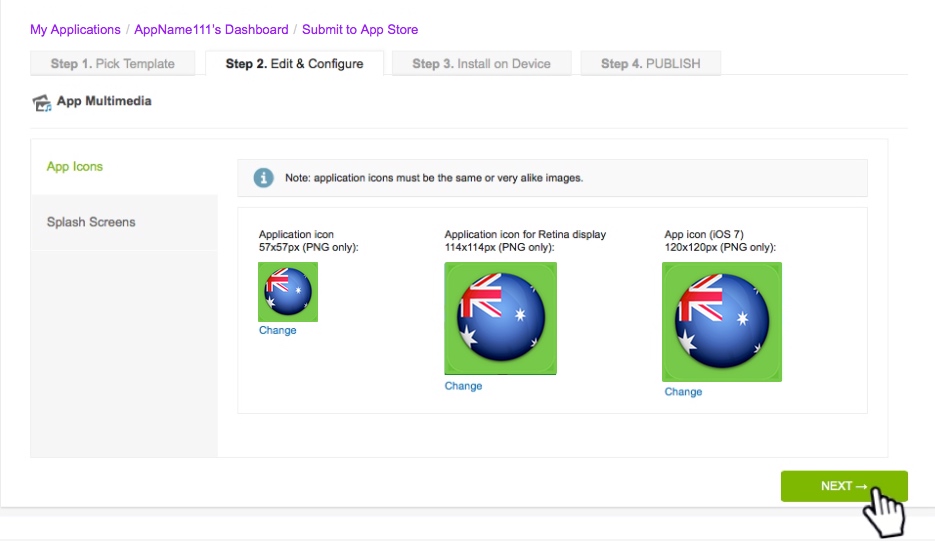
App Multimedia. If you have previously completed all the necessary steps detailed in How to Edit 'App Store' Properties & Multimedia, all the ‘App Icons’ and ‘Splash Screens’ will be pre-populated. Make sure you check all the Application Icons and Splash Screens are correct by selecting the relevant tab on the left of page.
For further information on how to edit the App Icons and Splash Screens for your App, go to How to Edit 'App Store' Properties & Multimedia. Click ‘NEXT’. The ‘Main App Settings’ screen appears (as shown below). |
Step 7 |
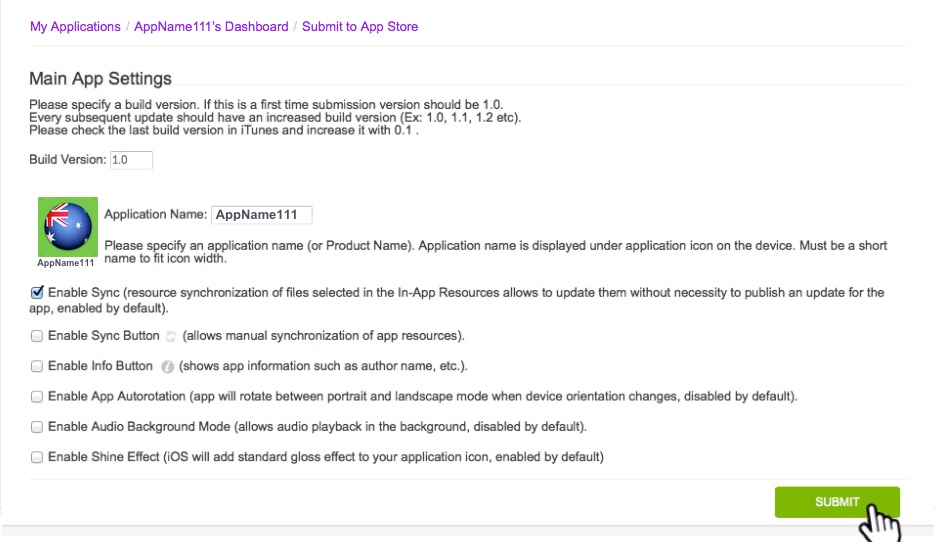
Build Version. Enter the ‘Build Version’ as required. Refer to the information provided on screen regarding build version increments.
Application Name. Check that the ‘Application Name’ is correct. Important: This is the name that will appear on the App Store. This name cannot be changed once submitted. Make sure it is right! ‘Enable Sync’ will be checked by default. We recommend leaving this selected to enable syncing without republishing. Note: Do not select any of the other options listed (e.g. do not select ‘Enable Sync Button’, ‘Enable Info Button’, ‘Enable App Autorotation’, 'Enable Audio Background Mode’ or ‘Enable Shine Effect’). These functions are not required for standard App Wizard template builds, however they can be edited by advanced users familiar with these settings. For further information on these functions, please contact the App Wizard Build Team. Click ‘SUBMIT’. The ‘Request Process Complete’ screen will appear (as shown below). |
Step 8 |
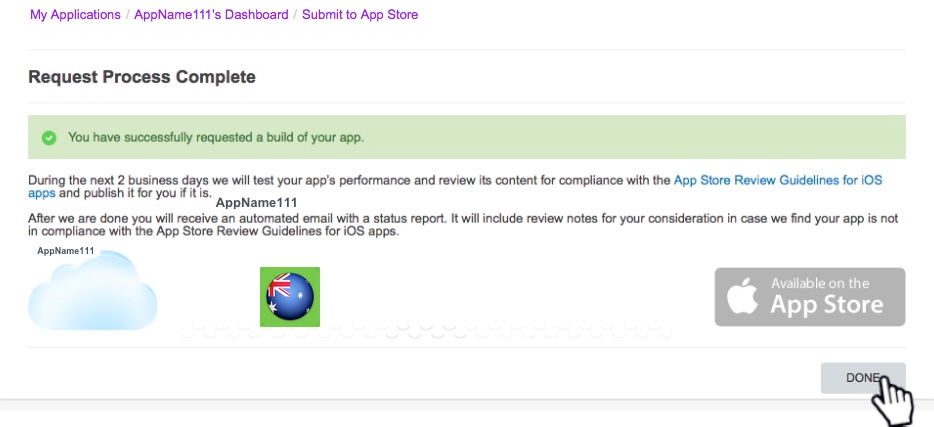
Congratulations. You have successfully requested an iOS build 'binary' so that you can now publish your App at the Apple App Store.
To learn more about the publishing process, including how to create the necessary certificates and distribution profile etc. (code sign files), see How to Create Code Sign Files for Your iOS App If the App is rejected by Apple for any reason, you will receive an email notification. The App Wizard Build Team can help clarify the necessary changes required to successfully publish your App in accordance with Apple's requirements.
Click ‘DONE’ to return to the ‘My Applications' list. |
